Building a waterfall in a small <a href="https://learncozy.com/entertaining-backyard-designs/”>backyard isn’t just possible, it’s one of the most rewarding weekend projects a homeowner can tackle. Whether working with 200 square feet or a narrow side yard, the sound of moving water transforms any outdoor space into a retreat. This guide walks through pondless systems, container builds, and rock arrangements that fit tight spaces and modest budgets. No need for a landscape architect or a creek running through the property. Just a pump, some stone, and a little sweat equity.
Table of Contents
ToggleKey Takeaways
- Small backyard waterfall ideas transform any tight outdoor space into a retreat with pondless systems, container builds, and rock arrangements that fit modest budgets.
- Proper pump sizing (1,500–3,000 GPH based on spillway width) and a GFCI-protected electrical outlet are critical to project success and safety.
- Pondless waterfalls hide reservoirs underground, reducing maintenance, algae blooms, and mosquito breeding while adding significant property value.
- Container and pot waterfall builds suit renters and space-limited yards, using three-pot stacks or wine barrel conversions that can be assembled in an afternoon.
- Undersizing the reservoir is the most common mistake—calculate total system volume and add 30% buffer to prevent the pump from running dry between top-offs.
- Winterization in cold climates (draining the system, storing the pump indoors, and covering the reservoir) prevents hundreds in replacement costs.
Why Add a Waterfall to Your Small Backyard?
A backyard waterfall does more than look good, it masks street noise, creates a focal point, and supports local wildlife. Birds and beneficial insects gravitate toward water features, and the white noise from a running pump drowns out traffic or neighbor conversations without cranking up a speaker.
From a practical standpoint, small waterfalls add property value. Real estate agents consistently note that water features rank among the top five outdoor upgrades buyers notice during showings. They signal that the homeowner invested in the space beyond basic landscaping.
Maintenance is lighter than most people expect. Pondless systems recirculate water through a hidden reservoir, eliminating algae blooms and reducing mosquito breeding. Homeowners in regions with freezing winters can winterize a pump in under an hour, making seasonal upkeep manageable even for first-time DIYers.
Planning Your Small Backyard Waterfall
Start by measuring the available footprint. A pondless waterfall can fit in as little as 4×6 feet, while container builds take up even less. Sketch the layout on graph paper, noting any underground utilities. Call 811 before digging, hitting a gas or electrical line turns a fun project into an expensive emergency.
Pump sizing matters more than most tutorials admit. Calculate gallons per hour (GPH) based on waterfall width and desired flow rate. For a 12-inch-wide spillway with moderate flow, plan for 1,500 GPH. Double that for a dramatic cascade. Submersible pumps rated for continuous duty handle residential use: look for models with debris screens and thermal overload protection.
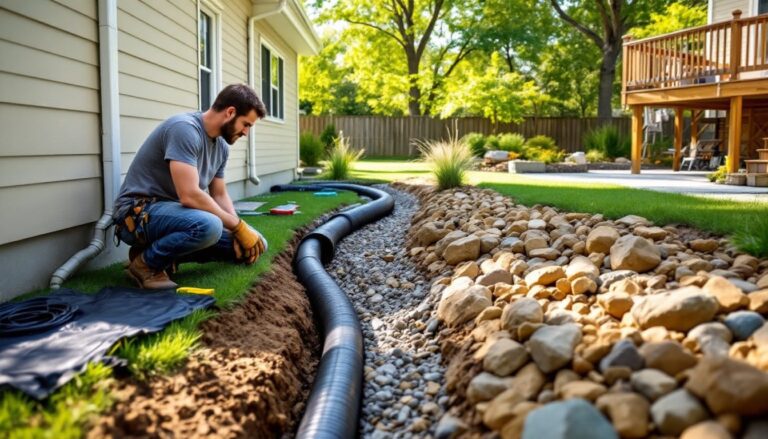
Electrical work requires a GFCI-protected outdoor outlet within reach of the pump cord. If the nearest outlet is more than 6 feet away, hire a licensed electrician to install one. Running extension cords through landscaping violates NEC code and creates a shock hazard. Permits aren’t typically required for non-structural water features, but local zoning may restrict heights or setbacks from property lines.
Consider water source and top-off frequency. Evaporation rates vary by climate, but expect to refill a pondless reservoir every 7–10 days in summer. Placing an auto-fill valve on a hose bib simplifies maintenance, though it adds to the initial parts list.
Pondless Waterfall Designs for Compact Spaces
Pondless waterfalls hide the reservoir underground, making them ideal for yards where kids or pets roam. The basic build involves digging a sump basin, installing a pump vault, and stacking stone over the supply line. Water cascades down the rocks, drains through pebbles into the basin, and recirculates.
For a minimalist linear design, use a single spillway stone or a pre-formed waterfall weir. These acrylic or fiberglass units create a clean sheet of water without stacking dozens of rocks. Pair them with dark Mexican beach pebbles for contrast. This style fits narrow side yards or urban patios and typically requires a 50-gallon reservoir buried 18 inches deep.
Tiered rock cascades work well on sloped lots. Excavate a trench following the grade, line it with 45-mil EPDM rubber liner, and secure flat flagstones at intervals to create steps. Each tier should overhang the one below by 2–3 inches to prevent water from running back underneath. Use expanding foam sealant (black, not tan) to lock stones in place and direct flow.
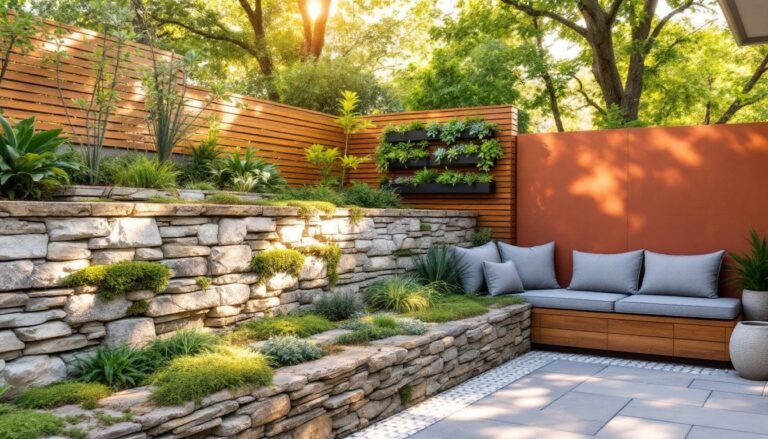
A disappearing urn feature mimics the look of a natural spring. Drill a hole through the center of a large ceramic or concrete pot, thread the pump tubing through, and fill the base with river rock. Water bubbles from the top and vanishes into the surrounding stone. This takes up less than 3 square feet and can be assembled in an afternoon. Homeowners often integrate these outdoor entertaining spaces as conversation starters near seating areas.
Safety note: Always wear leather gloves when handling flagstone or stacked rock. Sharp edges and weight combine to cause finger injuries. Keep a first-aid kit on site.
Container and Pot Waterfall Ideas
Container waterfalls suit renters, condo dwellers, or anyone who wants a no-dig option. The entire system sits above ground in a single vessel or tiered arrangement of pots. Fountain designs often inspire these builds, blending form and function.
A three-pot stack is the classic entry point. Choose ceramic or resin pots in descending sizes (16-inch, 12-inch, and 8-inch diameters work well). Drill drainage holes in the two upper pots using a carbide-tipped masonry bit and plenty of water to cool the bit. Seal the bottom pot with silicone caulk. Stack them on a sturdy platform, composite decking blocks or a metal plant stand, and run vinyl tubing from a small fountain pump in the base reservoir up through the centers.
Fill gaps between pots with smooth river stone or tumbled glass to hide the tubing. Plant creeping Jenny or dwarf mondo grass around the edges for a naturalistic look. This setup holds about 5 gallons and uses a 200 GPH pump.
Wine barrel conversions offer more capacity. A half whiskey barrel (roughly 25 gallons) can house a submersible pump, a riser pipe, and a capstone with a drilled hole. Top the pipe with a flat slate piece or a carved granite sphere. Water sheets across the stone and returns to the barrel. Line the inside with pond liner if the barrel isn’t watertight, and add a mosquito dunk tablet monthly to prevent larvae.
For apartment balconies, lightweight resin urns keep the load manageable. Check the balcony’s weight rating, water weighs 8.3 pounds per gallon, and keep total weight under 150 pounds for typical wood-framed structures. A 10-gallon urn with pump and stone stays under that threshold.
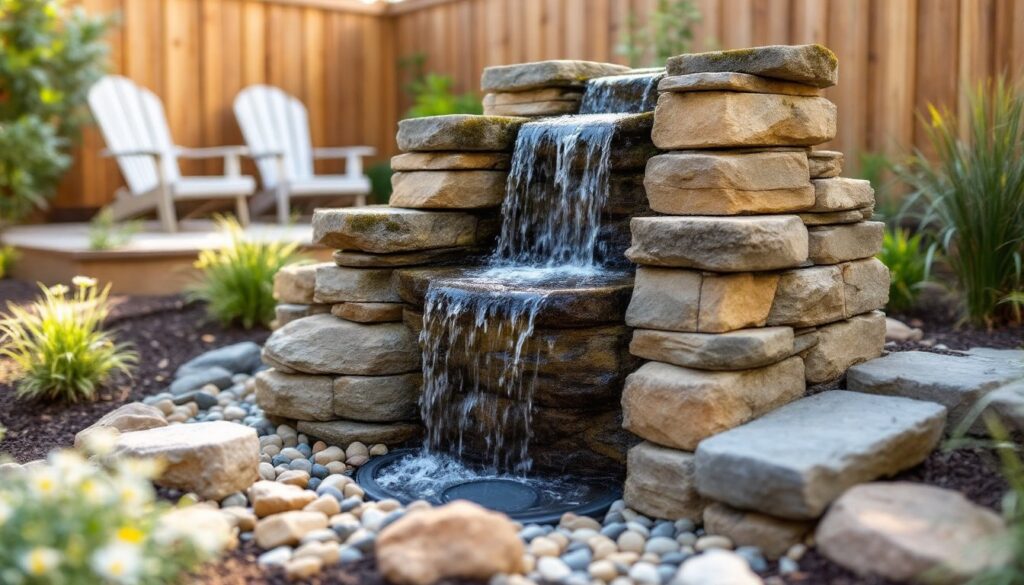
Rock and Stone Waterfall Arrangements
Natural stone creates the most convincing waterfalls. Sourcing locally reduces cost and ensures the rock matches regional geology. Fieldstone, moss rock, and limestone are common choices, each offering different textures and water flow characteristics.
Fieldstone stacks rely on flat, irregular pieces laid like shingles. Position each stone so it slopes slightly forward, directing water over the edge rather than underneath. Use angular pieces at the base for stability and save smoother stones for the upper tiers where water contact is visible. A 4-foot-tall stack typically requires 800–1,200 pounds of stone. Rent a hand truck or recruit help, fieldstone is unforgiving on the back.
Moss rock (also called feather rock) is volcanic and lightweight, making it easier to reposition during the build. Its porous surface encourages moss and algae growth, which adds authenticity over time. Downside: it’s softer and can crumble under freeze-thaw cycles in northern climates. Seal it with a water-based masonry sealer if winter temps drop below 20°F regularly.
Limestone ledges create dramatic horizontal layers. These stratified pieces split naturally along bedding planes, so they stack with minimal gaps. Water flows in smooth sheets across the flat surfaces, similar to commercial water walls. Limestone does raise pH slightly, which matters if aquatic plants or fish are part of the plan (though pondless builds avoid that issue). Many garden improvements feature limestone as a versatile hardscaping material.
For a boulder spillway, use one large anchor stone (300+ pounds) as the primary drop point. Nestle it into the slope, then build supporting walls of smaller rock on either side to funnel water toward the center. This design mimics mountain streams and handles high flow rates without looking forced.
Tool tip: A pry bar and wooden shims make stone positioning safer than wrestling rocks by hand. Lever the stone into place, slide shims underneath to adjust the angle, then pack gaps with smaller stones or decomposed granite.
DIY Installation Tips and Common Mistakes to Avoid
The single biggest mistake is undersizing the reservoir. Calculate total system volume (basin, tubing, and water visible on the rocks), then add 30% for evaporation buffer. A 3-foot-tall waterfall with a 2-foot-wide face needs at least a 40-gallon reservoir to prevent the pump from running dry between top-offs.
Skip the temptation to use a garden pond liner in place of proper underlayment. Lay down 2 inches of sand first, then a geotextile fabric layer, then the 45-mil EPDM liner. Sharp rocks puncture liners quickly without cushioning. Overlap liner seams by at least 6 inches and use pond-safe sealant on all joints.
Pump placement matters for noise control. Bury the pump vault at least 12 inches below grade and surround it with pea gravel. This dampens vibration. Avoid setting the pump directly on the basin bottom, it’ll rattle. Use a pump sock or pre-filter to catch leaves and debris before they clog the impeller.
Water flow rarely looks right on the first try. Plan to adjust stone angles and pump flow rate over the first week. Most submersible pumps include a flow control valve: start at 60% capacity and increase gradually. Too much flow creates splashing and noise, too little looks like a dribble. Aim for a smooth curtain effect on primary spillways and moderate turbulence over stepped rocks.
Check for leaks by filling the system and letting it run for four hours while watching the water level. Mark the starting point with a grease pencil on the reservoir wall. A drop of more than 1 inch in four hours indicates a leak. Trace it by turning off the pump and observing where water stops flowing, the leak is just above that point.
Winterizing in cold climates means draining the system, removing the pump, and covering the reservoir opening with plywood and a tarp weighted down with stones. Store the pump indoors in a bucket of water to keep seals from drying out. Disconnect and drain all tubing to prevent ice damage. Skipping this step costs hundreds in replacement parts come spring. Plenty of backyard design ideas require seasonal adjustments depending on climate.
Permit check: While most residential water features under 18 inches deep don’t trigger building permits, always verify local codes. Some municipalities restrict water features within 10 feet of property lines or require setbacks from septic fields. A quick call to the zoning office prevents expensive teardowns.
Conclusion
A small backyard waterfall delivers year-round enjoyment without monopolizing space or budget. Whether opting for a pondless cascade, a stacked pot fountain, or a natural stone arrangement, the project teaches valuable skills in grading, electrical safety, and stonework. Start simple, test the water flow, and adjust as needed. The sound of running water makes even the smallest yard feel expansive.