A cramped backyard doesn’t have to stay a forgotten patch of grass or a dumping ground for old patio furniture. With some strategic planning and elbow grease, even the smallest outdoor spaces can become functional extensions of the home. The good news? Transforming a tiny yard doesn’t require maxing out credit cards or hiring landscape architects. Budget-friendly materials, smart DIY solutions, and creative repurposing can deliver results that look intentional and polished. The key is working with what’s there, prioritizing high-impact changes, and skipping the impulse buys that eat budgets without adding real value.
Table of Contents
ToggleKey Takeaways
- Start with a scaled layout plan on paper or a free app like SketchUp to avoid cramming too many features into your small backyard design and ensure smart space usage.
- Use affordable materials like pea gravel ($30–$50/cubic yard), mulch, and DIY concrete pavers to create defined zones that make small yards feel larger without expensive contractor costs.
- Maximize greenery on a budget by starting perennials from smaller pots, seed-starting annuals, propagating existing plants, and shopping end-of-season sales for 50–75% discounts.
- Build DIY seating for $50–$80 using cinder blocks, pressure-treated lumber, or pallets instead of purchasing retail outdoor furniture.
- Transform your small backyard with solar path lights and LED string lights ($1–$25 each) for evening ambiance and extended usability without expensive low-voltage systems.
- Repurpose flea market finds and salvaged materials like old ladders, vintage buckets, and reclaimed shutters to add unique character and one-of-a-kind decor on virtually no budget.
Start with a Smart Layout Plan
Before buying a single bag of mulch or digging any holes, measure the space and sketch a scaled layout on graph paper or a free app like SketchUp. Small yards fail when they’re treated like miniature versions of sprawling landscapes, too many features crammed together create visual clutter and limit usability.
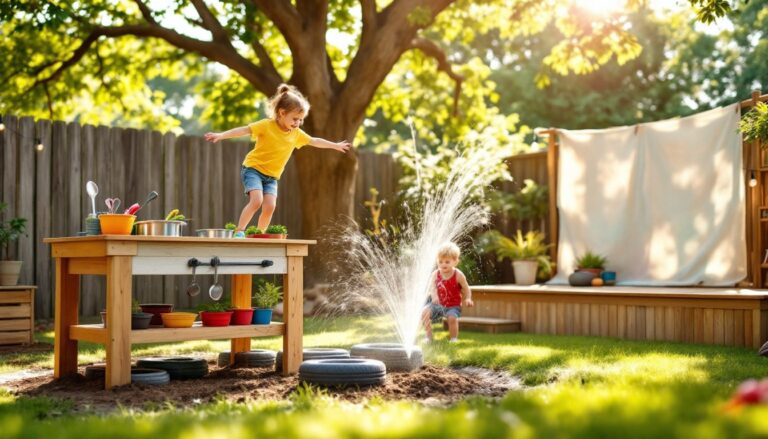
Identify how the space will actually be used. A family with kids prioritizes open play area over elaborate planting beds. Frequent hosts might allocate square footage to a dining zone and keep plantings to the perimeter. Solo dwellers might want a quiet corner for morning coffee and a compact herb garden.
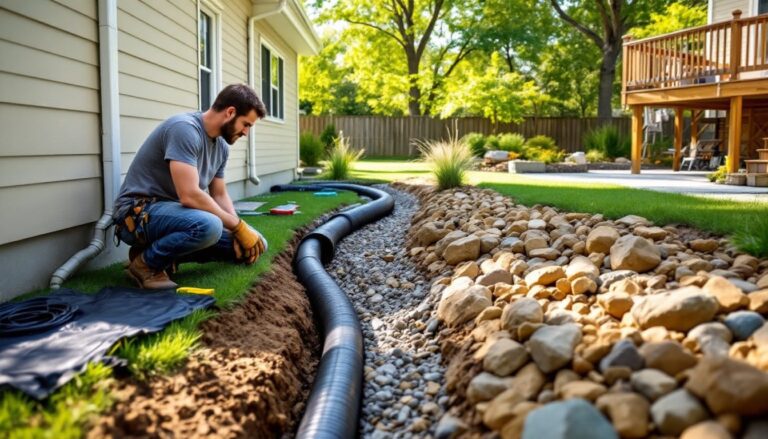
Measure twice, commit once. Note existing features like fence lines, utility boxes, downspouts, and established trees. Check sun exposure throughout the day using a compass app, this dictates where seating areas should go (afternoon shade in summer climates) and which plants will thrive.
Snap photos from multiple angles, then print them out. Sketch potential layouts directly on the photos with a pencil. This low-tech trick helps visualize scale better than drawings alone. Consider traffic flow: paths should be at least 3 feet wide for comfortable passage, and dining areas need roughly 10×10 feet to accommodate a table and chairs without crowding.
Skip trendy design styles that don’t match the home’s architecture or the surrounding neighborhood. A modern minimalist yard looks out of place next to a cottage-style bungalow, and resale value suffers when outdoor spaces clash with the structure.
Create Zones with Budget-Friendly Materials
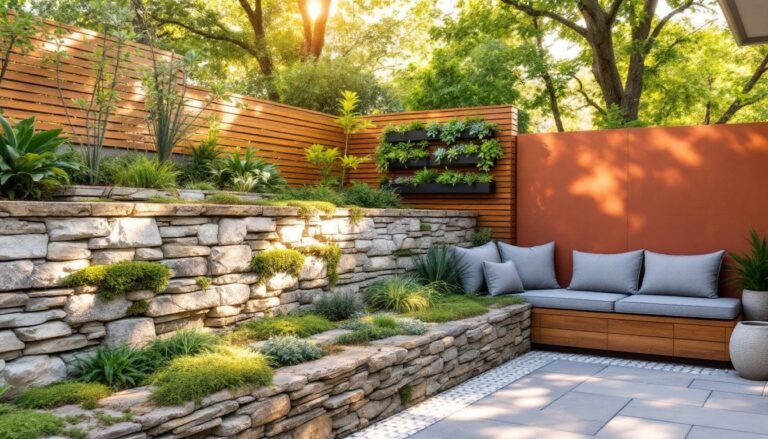
Defining separate zones makes small yards feel larger and more purposeful. Instead of expensive pavers or poured concrete, use affordable materials that deliver visual impact without the contractor price tag.
Pea gravel costs roughly $30–$50 per cubic yard and creates clean-lined pathways or seating areas. Lay down landscape fabric first (about $0.10–$0.25 per square foot) to suppress weeds, then spread 2–3 inches of gravel. Edge with pressure-treated 2×4 lumber staked every 3 feet to keep gravel contained. The look is modern farmhouse without the farmhouse budget.
Mulch works for low-traffic zones. Hardwood mulch runs $25–$40 per cubic yard and defines planting beds while retaining soil moisture. For high-traffic areas, skip mulch, it compacts and looks shabby fast.
Stepping stones add structure. Cast DIY pavers using an $8 mold and an 80-pound bag of concrete mix ($5–$7). Each bag yields 4–5 pavers. Set them in gravel or directly on tamped soil with a 1-inch sand base. Space them 18–24 inches apart for a natural walking rhythm. Many DIYers find inspiration for outdoor zones in larger entertaining backyard spaces.
Reclaimed brick or broken concrete (urbanite) can often be sourced for free via Craigslist or construction sites. Use it to edge beds or create rustic pathways. Always ask permission before hauling away materials from job sites.
Avoid mixing too many materials in one small space. Stick to two or three textures max, gravel, wood, and greenery, for example. Too much variety reads as chaotic in tight quarters.
Add Greenery Without the High Price Tag
Established plants at nurseries carry hefty price tags, but patient DIYers have cheaper options. Start perennials and shrubs from 4-inch pots instead of gallon containers, they’ll catch up in a season or two and cost half as much.
Seed starting stretches budgets further. Annual flowers like zinnias, marigolds, and sunflowers germinate easily indoors under a $25 LED grow light. Harden off seedlings by gradually exposing them to outdoor conditions over 7–10 days before transplanting.
Propagate existing plants. Many perennials (hostas, daylilies, ornamental grasses) can be divided in early spring or fall. Dig up the root ball, slice it into sections with a sharp spade, and replant. Succulents propagate from leaf cuttings, just let the cut end callus for a day, then stick it in well-draining soil.
Shop end-of-season sales at big-box stores. Perennials marked down 50–75% in late summer or fall will establish roots over winter and bounce back in spring. Inspect for pests and disease before buying distressed stock. Vertical planting maximizes small spaces, particularly when designing patios with limited square footage.
Containerized herbs serve double duty as edible landscaping. Basil, rosemary, thyme, and oregano thrive in pots and can be moved to follow the sun. Use 5-gallon buckets with drainage holes drilled in the bottom, they cost $3–$5 each at hardware stores.
Skip high-maintenance lawns in tiny yards. Replace turf with low-growing ground covers like creeping thyme, clover, or sedum. These alternatives require less water, no mowing, and stay green longer in drought conditions. According to resources like Gardenista, ground covers also reduce maintenance time significantly while adding texture.
DIY Seating and Dining Solutions
Outdoor furniture gets expensive fast, but built-in seating and DIY projects deliver custom solutions for a fraction of retail prices.
Cinder block benches cost roughly $2 per block. Stack blocks in two columns, insert 4×4 pressure-treated posts through the cells for stability, and top with 2×10 lumber or a salvaged door cut to size. Add outdoor cushions (watch for clearance sales) for comfort. Total cost: $50–$80 for a 6-foot bench.
Pallet furniture is ubiquitous for a reason, it’s cheap and modular. Source heat-treated pallets (stamped HT, not MB, which indicates chemical treatment) from warehouses or garden centers. Sand rough edges with 80-grit sandpaper, then seal with exterior polyurethane or paint with exterior latex. Stack two pallets for a sofa base, add a twin mattress or foam cushion, and prop with throw pillows.
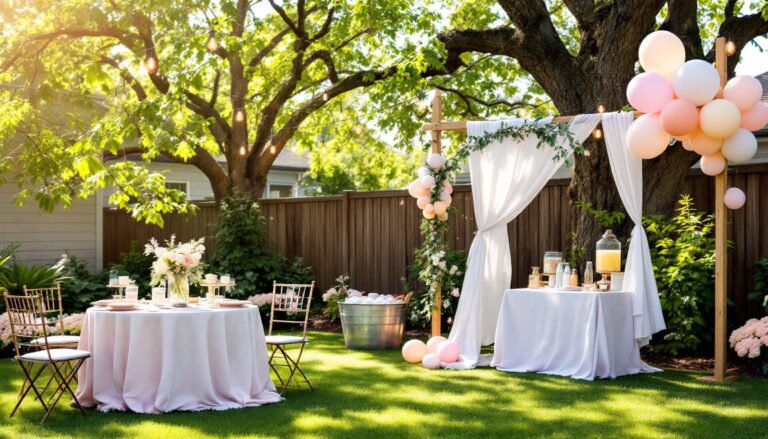
For a dining setup, use a hollow-core door ($25–$40) as a tabletop. Mount it on two sawhorses or build simple legs from 2x4s. Sand, prime, and paint with exterior enamel. Pair with folding chairs or stumps cut to 18-inch heights and sanded smooth. Homeowners planning regular gatherings often explore backyard patio entertaining setups to guide furniture placement.
Built-in planters with seating edges do double duty. Frame a raised bed with 2×10 or 2×12 boards, cap the top edge with a 2×6 or 2×8 mounted flat as a bench surface, and secure everything with 3-inch exterior screws. Fill the planter with soil and trailing plants.
Always use pressure-treated or naturally rot-resistant lumber (cedar, redwood) for ground-contact projects. Standard pine will rot within a season. Seal all wood projects with a clear exterior sealer or stain to extend lifespan.
Lighting That Makes a Big Impact for Less
Lighting transforms yards after dark and extends usability into evening hours. Skip expensive low-voltage systems in favor of solar and DIY options.
Solar path lights cost $1–$3 each during sales. Line pathways and bed edges for safety and ambiance. Choose models with replaceable AA or AAA rechargeable batteries, cheap units often fail within a year because the batteries die, not the fixture itself.
String lights create instant atmosphere. Run outdoor-rated LED string lights (about $15–$25 for a 25-foot strand) along fence lines, pergolas, or between posts. Use galvanized eye hooks or screw-in cup hooks for mounting points. For power, run an outdoor-rated extension cord to a GFCI-protected outlet. If none exists, hire an electrician, outdoor electrical work must meet NEC code, and DIY installations risk shock or fire.
Mason jar lanterns add charm without cost. Wrap 18-gauge galvanized wire around the jar neck to create a handle, insert a battery-operated LED tea light, and hang from shepherd’s hooks or tree branches. Drill a small drainage hole in the lid if leaving jars outside year-round.
Uplighting highlights trees and architectural features. Position a $10–$15 solar spotlight at the base of a tree trunk or large shrub, angled upward. The shadows create dramatic dimension at night.
DIY tiki torches from copper pipe and fittings cost about $8 per torch. Cut 1/2-inch copper pipe to 4–5 feet, cap one end, drill a hole for the wick, and drive a 24-inch rebar stake into the ground for stability. Fill with citronella oil to deter mosquitoes. Many ideas for outdoor lighting appear on DIY home sites like Making Manzanita, where simple fixtures meet creative design.
Never use indoor lights outdoors. They’re not weatherproofed and pose fire and shock hazards.
Upcycle and Repurpose for Unique Decor
Unique doesn’t have to mean expensive. Flea markets, estate sales, and curbside castoffs supply raw materials for one-of-a-kind yard features.
Old ladders become vertical plant displays. Lean a wooden ladder against a fence, secure it with L-brackets, and set potted plants on each rung. Sand and repaint if desired, or leave weathered for rustic charm.
Vintage watering cans, buckets, and colanders serve as quirky planters. Drill drainage holes with a 1/4-inch bit if they don’t already have them. Hang from hooks or cluster on a tiered plant stand.
Broken terra cotta pots create fairy garden landscapes. Arrange the shards as tiny terraces, tuck in miniature succulents, and add small figurines or pebbles for whimsy.
Galvanized metal tubs ($10–$20 at farm supply stores) function as water features, ice bins for parties, or oversized planters. For a simple fountain, drill a hole in the center, install a small submersible pump ($15–$25), and stack stones to hide the pump. Plug into a GFCI outlet.
Pallets work beyond furniture. Stand one upright, staple landscape fabric to the back, fill the slats with potting soil, and plant herbs or succulents in each gap. Let it cure flat for two weeks before hanging vertically so roots establish. Bloggers at Young House Love have showcased pallet gardens extensively in past DIY tutorials.
Reclaimed shutters make instant privacy screens or trellis panels. Attach them to fence posts with exterior hinges or lean them freestanding. Paint in bold colors for a cottage vibe or leave natural.
Before drilling, painting, or cutting, clean all salvaged items thoroughly. Scrub with a mix of 1 part bleach to 10 parts water, rinse well, and dry completely. This kills mold, bacteria, and insect eggs.
Conclusion
Small backyards on tight budgets don’t have to settle for boring or neglected. With deliberate planning, affordable materials, and sweat equity, even the tightest outdoor spaces can deliver real function and style. Start with a clear layout, define zones with cost-effective hardscaping, prioritize greenery that fits the budget, and build or upcycle seating and decor. Lighting extends usability into the evening, and repurposed materials add character that cookie-cutter retail items can’t match. The difference between a forgotten yard and a go-to outdoor retreat isn’t the price tag, it’s the planning and effort invested.