A small backyard doesn’t have to feel cramped or underutilized. With thoughtful planning and a modest budget, homeowners can transform even the tightest outdoor footprint into a functional, inviting space. Whether the goal is entertaining, growing fresh produce, or simply creating a retreat, small yards offer unique opportunities to layer vertical elements, repurpose materials, and maximize every square foot. The following ideas prioritize low-cost materials, straightforward construction techniques, and projects that deliver immediate impact without requiring specialized skills or costly equipment.
Table of Contents
ToggleKey Takeaways
- Cheap backyard ideas like reclaimed patios, vertical gardens, and fire pits transform small yards for under $100–$300 per project using salvaged or budget-friendly materials.
- Vertical gardens maximize limited space by utilizing walls and fences for herbs, vegetables, and ornamental plants with minimal ground footprint.
- Low-voltage solar and string lighting solutions eliminate expensive electrical work while extending evening usability for only $15–$150.
- Raised garden beds built from concrete blocks, untreated lumber, or corrugated metal provide affordable, accessible growing space that improves drainage and soil warmth.
- Upcycling thrift store furniture and weatherproofing with exterior paint and outdoor-grade fabric creates seating areas at nearly zero cost.
- Success in small yards depends on strategic planning, repurposing materials, and choosing multipurpose features rather than expensive square footage.
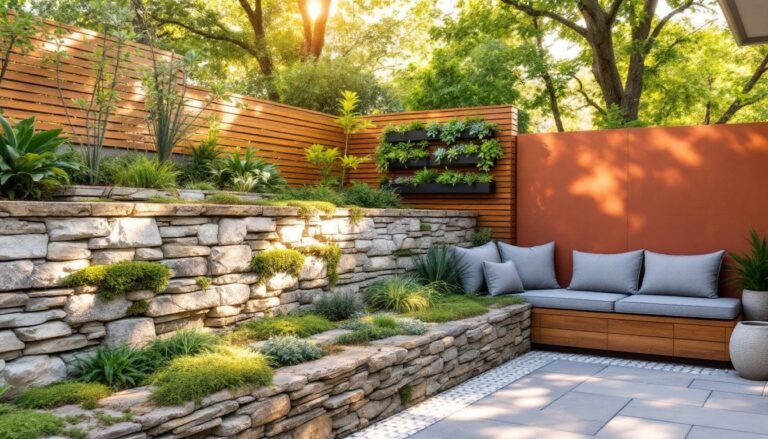
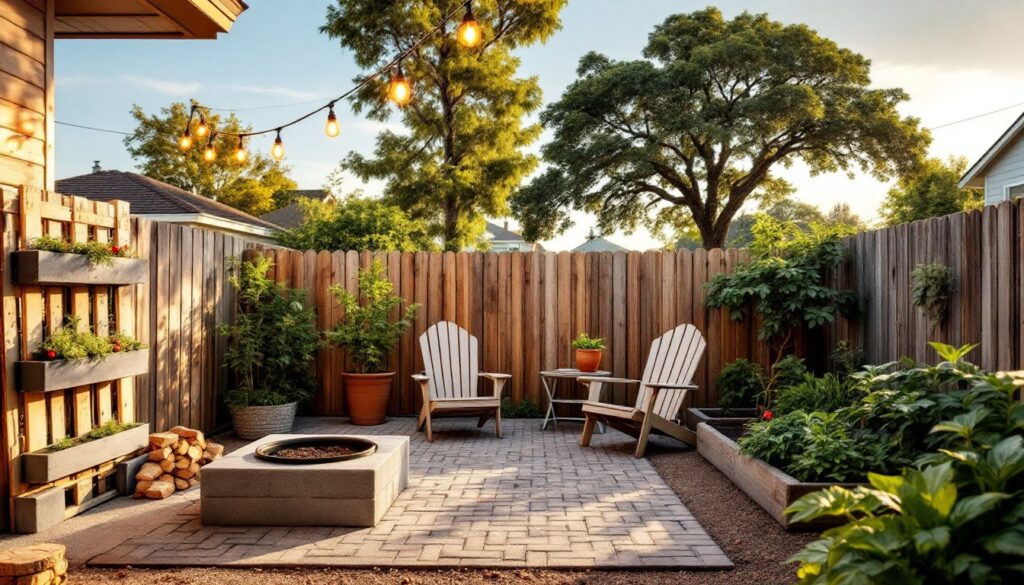
Create a Cozy Patio Using Reclaimed Materials
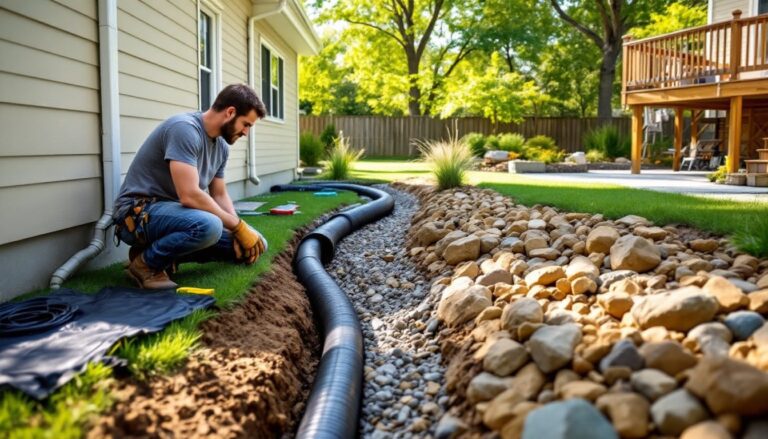
Building a patio with reclaimed materials cuts costs significantly while adding character. Salvaged bricks, broken concrete (urbanite), and repurposed pavers provide durable surfaces at a fraction of the price of new materials.
Materials to source:
- Reclaimed bricks from demolition sites or online marketplaces
- Broken concrete slabs (free from construction waste or neighbors replacing driveways)
- Crushed gravel or decomposed granite for a stable base (around $30–$50 per cubic yard)
- Landscape fabric to suppress weeds
Start by marking the patio perimeter with stakes and string. Excavate 4–6 inches deep, ensuring the base slopes slightly away from the house for drainage (about 1/4 inch per foot). Compact the soil with a hand tamper or plate compactor. Lay landscape fabric, then add 2–3 inches of crushed gravel, compacting in layers.
Arrange bricks or urbanite pieces in the desired pattern, running bond, herringbone, or random flagstone-style layouts all work. Leave 1/2-inch gaps between pieces for polymeric sand, which locks pavers in place and resists weed growth. Sweep sand into joints, mist lightly, and let cure.
Safety note: Wear work gloves and safety glasses when handling broken concrete. Jagged edges can cause cuts.
This approach works well for patios up to 100 square feet. For larger areas or load-bearing applications, consult local codes about base depth and compaction requirements. Many homes feature outdoor entertaining spaces that blend salvaged and new materials for a custom look.
Add Vertical Gardens to Maximize Limited Space
Vertical gardens turn walls, fences, and railings into productive growing space. They’re ideal for small yards where ground-level square footage is limited.
Vertical garden options:
- Pallet planters: Disassemble or leave intact, attach landscape fabric to the back, fill pockets with potting mix, and mount securely to a wall or fence. Free pallets are available from hardware stores, but inspect for stamps indicating heat treatment (HT) rather than chemical treatment (MB).
- Hanging gutter gardens: Repurpose vinyl or aluminum gutters as narrow planters. Cap the ends, drill drainage holes every 6–8 inches, and mount with gutter brackets. These work well for shallow-rooted crops like lettuce, herbs, and strawberries.
- Wall-mounted pocket planters: Fabric or felt pockets hang on hooks or rails and hold individual plants. Commercial versions cost $20–$60, but DIY versions using canvas drop cloths and grommets run under $15.
Installation tips:
When mounting to wood fences, use 3-inch exterior-grade screws driven into fence posts or horizontal rails, never just pickets. For masonry or stucco, use masonry anchors rated for the planter’s filled weight (figure 10–15 pounds per linear foot for a gutter planter).
Choose plants suited to the sun exposure. South-facing walls get intense heat: select drought-tolerant herbs like rosemary or thyme. North-facing spots suit shade-tolerant greens like spinach. Vertical systems dry out faster than ground beds, so check moisture daily during hot weather. Drip irrigation kits with timers ($30–$50) automate watering and reduce maintenance.
Some rental garden makeovers rely heavily on vertical elements since they’re removable and don’t alter the property permanently.
DIY Fire Pit on a Budget
A simple fire pit becomes a backyard focal point for under $100. Two main styles fit small spaces: in-ground and above-ground ring designs.
In-ground fire pit:
Dig a bowl-shaped pit 12–18 inches deep and 3–4 feet in diameter. Remove grass and organic matter. Line the bottom with 4–6 inches of pea gravel for drainage. Ring the perimeter with retaining wall blocks, firebricks, or stacked stone. No mortar is required for a basic design, gravity and tight fitting hold blocks in place.
Above-ground fire ring:
Use a steel fire ring insert (available at home centers for $40–$80) or a repurposed washing machine drum (a classic DIYer’s trick). Surround the ring with retaining wall blocks, dry-stacking 2–3 courses high. Cap the top course with flat capstones for a finished edge and a place to rest drinks.
Critical safety and code considerations:
- Check local fire codes. Many municipalities require fire pits to be at least 10 feet from structures, 25 feet in some areas. Some jurisdictions ban open fires entirely.
- Place fire pits on non-combustible surfaces, gravel, pavers, or bare soil. Never on wood decks or dry grass.
- Keep a garden hose or fire extinguisher within reach.
- Avoid burning pressure-treated lumber, painted wood, or trash. These release toxic fumes.
PPE: Wear work gloves when handling blocks and firebrick. Safety glasses protect against chips when cutting or splitting stone.
Fire pits integrate naturally into entertaining backyard designs and provide year-round functionality in mild climates.
Use Affordable Outdoor Lighting for Ambiance
Lighting extends usable hours and transforms the mood of a small yard. Low-voltage and solar options eliminate the need for electrical permits and costly wiring.
Budget lighting solutions:
- Solar path lights: $2–$5 per fixture. Stake along walkways or garden beds. Performance depends on sunlight exposure: expect 4–6 hours of runtime after a full day’s charge.
- String lights: Edison-style LED strings cost $15–$40 for 25–50 feet. Drape between posts, along fences, or overhead on guide wires. Use outdoor-rated cords and fixtures (look for wet location ratings).
- Low-voltage landscape kits: Kits with transformer, cable, and 6–10 fixtures run $80–$150. Install along pathways, uplight trees, or accent architectural features. Transformers step down household 120V to safe 12V.
Installation basics:
For string lights, anchor guide wires using screw eyes or cup hooks into fence posts or wall studs. Pull wire taut to prevent sagging. Use cable staples to secure low-voltage landscape wire along fences or bury 6 inches deep in trenches to prevent trip hazards.
Pro tip: Place lighting on a timer or photocell sensor to automate operation. Many low-voltage transformers include built-in timers.
Safety: Always use GFCI-protected outlets for outdoor lighting. Even low-voltage systems should connect to a GFCI if the transformer plugs into a standard outlet. Keep connections above grade and protect with weatherproof covers.
Residents in apartments or rentals can explore small-space lighting ideas that require no permanent installation, such as battery-powered LED strips or clip-on solar spotlights.
Build Raised Garden Beds with Inexpensive Materials
Raised beds improve drainage, warm soil faster in spring, and make gardening more accessible. They’re also highly affordable when built from salvaged or budget materials.
Material options:
- Dimensional lumber: Untreated cedar or redwood resists rot naturally but costs $8–$12 per board foot. Untreated pine or fir runs $2–$4 per board foot and lasts 3–5 years. Avoid pressure-treated lumber if growing edibles: older formulations contained arsenic, and even newer ACQ-treated wood leaches copper.
- Concrete blocks: Standard 8x8x16-inch blocks cost under $2 each. Stack two courses (16 inches high) without mortar for quick assembly. Blocks absorb and radiate heat, extending the growing season.
- Corrugated metal roofing panels: Salvaged or new panels ($10–$20 each) bent into U-shapes and staked with rebar create modern, durable beds. Wear gloves, edges are sharp.
Construction steps (wood frame):
- Cut boards to length. A 4×8-foot bed uses two 8-foot and two 4-foot pieces of 2×10 lumber.
- Assemble corners with 3-inch exterior-grade screws or galvanized nails. Pre-drill to prevent splitting.
- Level the site. If ground is uneven, adjust bed height rather than excavating.
- Line the bottom with hardware cloth (1/4-inch mesh) to exclude burrowing pests like voles.
- Fill with a mix of topsoil, compost, and peat moss or coconut coir (1:1:1 ratio works for most vegetables).
Dimensions: Beds should be no wider than 4 feet so the center is reachable from either side. Height of 10–12 inches suits most crops. Deeper beds (18–24 inches) benefit root vegetables like carrots and parsnips.
Incorporating raised beds into child-friendly backyards allows kids to participate in planting and harvesting without needing to navigate full-sized garden plots.
Repurpose and Upcycle Furniture for Outdoor Seating
Old indoor furniture transitions to outdoor use with weatherproofing and minor repairs, cutting seating costs to nearly zero.
Furniture candidates:
- Wooden dining chairs, benches, and small tables from thrift stores or curbside pickups
- Metal folding chairs (strip rust, prime, and repaint)
- Upholstered pieces (reupholster with outdoor-grade fabric like Sunbrella)
Weatherproofing steps:
- Clean and repair: Wash surfaces with TSP (trisodium phosphate) to remove grease and grime. Tighten loose joints with wood glue and clamps. Replace missing screws or bolts.
- Sand: Use 120-grit sandpaper to smooth rough spots and remove old finish. Wipe with a tack cloth.
- Prime and paint: Apply exterior-grade primer, then two coats of exterior latex or oil-based paint. Let dry 24 hours between coats. For raw wood, consider marine-grade spar varnish for UV and moisture protection.
- Seal metal: Wire-brush rust, apply rust-converting primer, then spray paint with enamel formulated for metal.
Cushions and fabric: Outdoor cushions face sun, rain, and mildew. Solution-dyed acrylic fabrics (Sunbrella is the best-known brand, but generic versions exist) resist fading and moisture. DIY cushion covers cost $15–$30 in materials versus $50–$100 for ready-made.
Maintenance: Store cushions indoors or in a deck box during prolonged rain. Even outdoor-rated fabrics benefit from occasional cleaning with mild soap and water.
Many backyard patio entertaining ideas leverage a mix of repurposed and new furniture to create an eclectic, personalized look. Seasonal home projects highlighted on Better Homes & Gardens often include furniture makeovers as a staple of budget-friendly outdoor updates.
Conclusion
Small yards reward strategic planning and resourcefulness. By focusing on vertical elements, salvaged materials, and multipurpose features, homeowners can build functional outdoor spaces without draining savings accounts. Each project here scales to fit tight footprints and limited budgets, proving that square footage matters less than smart design and a willingness to get hands dirty.