Planters do more than hold dirt, they define zones, add height, and turn bare ground into productive growing space. Whether you’re working with a sprawling lawn or a narrow patio, the right planter setup can maximize what you grow and how good it looks doing it. From raised beds that save your knees to vertical walls that turn square footage into cubic footage, these designs solve real problems while delivering serious curb appeal. No vague inspiration here, just proven planter builds, material callouts, and plant pairings that work.
Table of Contents
ToggleKey Takeaways
- Backyard planter ideas transform poor soil and limited space into productive gardens by eliminating bending, improving drainage, and creating defined zones without permanent hardscaping.
- Raised bed planters work best at 4 feet wide by 8 feet long with 12–18 inches of depth, filled with a 60% topsoil, 30% compost, and 10% perlite mix for optimal vegetable and herb growth.
- Vertical planters like trellis-backed containers, pocket walls, and gutter gardens maximize small spaces by converting square footage into cubic footage, though they require frequent watering with drip irrigation systems.
- Repurposed containers—from galvanized stock tanks and whiskey barrels to five-gallon food-grade buckets—offer affordable planter solutions as long as drainage holes are drilled every 10–12 inches.
- Tiered and stacked planter designs add visual interest and improve air circulation while organizing plants by sun and water needs, with taller varieties planted in back to avoid shading shorter plants.
- Container soil choice directly impacts success more than the planter material itself; use quality potting mix for flowers, nutrient-rich vegetable blends for crops, and fertilize every two weeks since frequent watering leaches nutrients.
Why Backyard Planters Are a Game-Changer for Your Outdoor Space
Planters solve problems that in-ground beds can’t. Poor soil? Skip it entirely and fill containers with quality growing medium. Limited mobility? Raise the bed to waist height and eliminate bending. Need to garden on concrete, clay, or compacted fill dirt? Planters create ideal conditions where nature didn’t cooperate.
They also define space. A row of planters marks the edge of a patio design without building permanent hardscaping. Stacked or tiered setups add vertical interest to flat yards. And unlike permanent landscape features, planters move, rearrange them seasonally, follow the sun, or swap out tired plantings without a shovel.
From a practical standpoint, planters offer better drainage control than native soil, warmer root zones in spring (important for tomatoes and peppers), and a physical barrier against ground-dwelling pests like voles and gophers. They’re also easier to protect with row covers or cold frames when frost threatens.
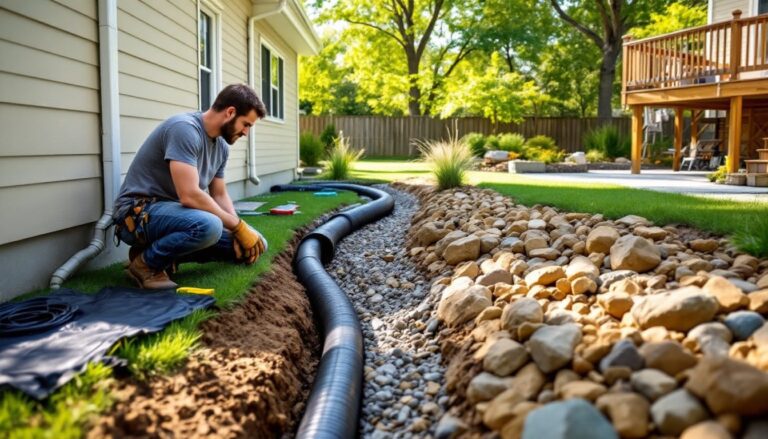
Raised Bed Planters for Vegetables and Herbs
Raised bed planters are the workhorse of productive gardens. Standard dimensions run 4 feet wide by 8 feet long, but width matters more than length, you should be able to reach the center from either side without stepping into the bed and compacting soil.
For depth, 12 inches minimum works for most vegetables. Root crops like carrots and parsnips prefer 18 inches or more. Shallow beds (6 to 8 inches) suffice for lettuce and herbs but limit crop variety.
Materials to consider:
- Cedar or redwood: Naturally rot-resistant, no treatment needed. Expect 10–15 years of life. Use nominal 2×12 or 2×10 boards (actual dimensions 1.5″ × 11.25″ or 1.5″ × 9.25″).
- Composite lumber: Lasts longer than wood but costs more upfront. Doesn’t leach chemicals and won’t splinter.
- Galvanized steel: Sleek, modern look. Conducts heat, so use in cooler climates or with thick mulch layers to buffer roots.
- Concrete block: Budget-friendly and permanent. Cavities in the blocks can hold herbs or flowers.
Avoid railroad ties and pressure-treated lumber older than 2004. Modern ACQ-treated lumber is considered safe for vegetable gardens, but purists often skip it.
Assembly is straightforward: cut boards to length, join corners with 3-inch exterior screws or galvanized corner brackets, and level the frame before filling. Line the bottom with hardware cloth (1/4-inch mesh) to exclude burrowing rodents.
Fill with a mix of 60% topsoil, 30% compost, and 10% perlite or coarse sand for drainage. Avoid “garden soil” in bags, it’s too dense for containers. Look for products labeled as raised bed mix or make your own.
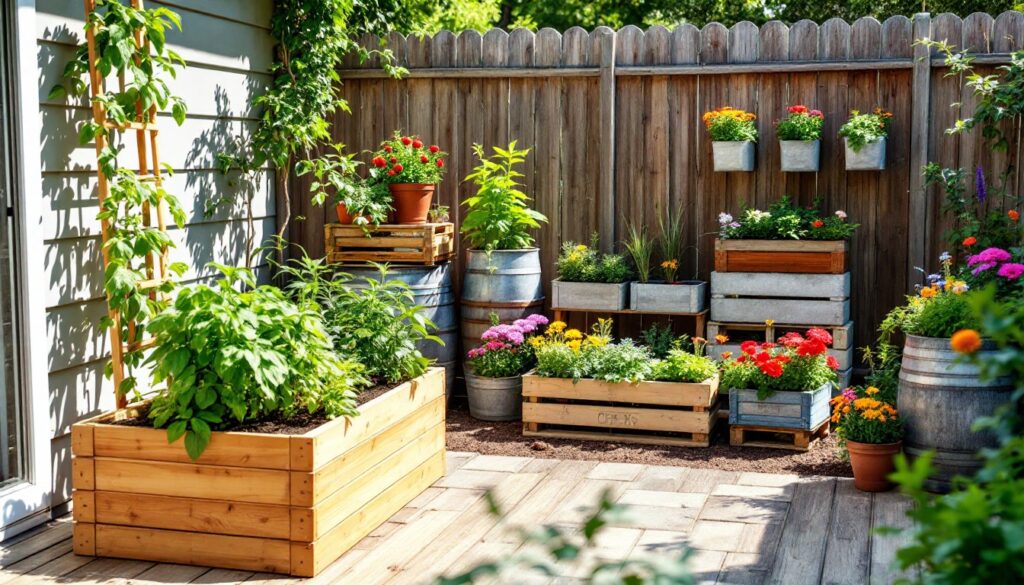
Vertical Planters to Maximize Small Spaces
When ground space is tight, build up. Vertical planters multiply growing area without expanding your footprint, critical for balconies, courtyards, or narrow side yards.
Trellis-backed planters combine a ground-level container with an attached climbing structure. Build a simple frame from 2×2 cedar and stretch galvanized wire mesh or nylon trellis netting across it. Plant pole beans, cucumbers, or morning glories at the base. The container should be at least 12 inches deep for adequate root development.
Pocket planters use fabric or felt panels with built-in pockets, mounted to a fence or freestanding frame. They work well for shallow-rooted crops like lettuce, strawberries, and herbs. Irrigation is the tricky part, top pockets drain into lower ones, so water thoroughly and account for runoff.
Stacked crate or pallet gardens repurpose shipping materials into rustic vertical gardens. Sand rough edges, line compartments with landscape fabric to contain soil, and secure the structure to a wall or post with lag bolts. Wear gloves and safety glasses when cutting or sanding reclaimed wood, splinters and hidden nails are common.
Gutter gardens are another budget option for herbs and greens. Mount vinyl or aluminum gutters horizontally on a fence, drill drainage holes every 8 inches, cap the ends, and fill with lightweight potting mix. These dry out fast, so drip irrigation or daily hand-watering is essential.
Vertical setups often require more frequent watering than ground-level beds because container gardens lose moisture through sides and bottoms. A drip system on a timer solves this and pays for itself in saved plants.
Repurposed and DIY Container Planter Ideas
Almost anything that holds soil and drains can become a planter. The trick is matching container size to plant needs and ensuring proper drainage.
Galvanized stock tanks (the kind used for livestock watering) make excellent large-scale planters. Drill 1/2-inch drainage holes every 10 to 12 inches across the bottom using a step bit. A 2-foot-diameter tank holds roughly 30 gallons of soil, enough for a small tomato or pepper trio.
Whiskey barrels are classic but heavy. A full half-barrel weighs 300+ pounds, so place it before filling. Drill additional drainage holes if needed (most come with one or two) and line the interior with landscape fabric to slow rot.
Concrete mixing tubs cost under $10, last for years, and come in multiple sizes. They’re UV-stable and crack-resistant. Drill drainage, add soil, and plant.
Wooden crates and boxes work if you line them with heavy-duty plastic (punctured for drainage) or landscape fabric. Unlined wood rots within two seasons in constant contact with moist soil.
Five-gallon buckets are utilitarian but effective. Food-grade buckets (bakeries and delis often give them away) are ideal. Drill four to six 1/2-inch holes in the bottom. Each bucket supports one tomato plant, two pepper plants, or a generous herb mix.
For a more decorative approach, consider outdoor entertaining spaces where planters double as design elements. Group containers of varying heights and materials, pair a tall galvanized tub with shorter ceramic pots and a wooden crate for textural contrast.
Safety note: When drilling metal containers, secure the piece, use cutting oil, and wear safety glasses. Metal shavings are sharp and fly unpredictably.
Tiered and Stacked Planter Designs for Visual Interest
Tiered planters create focal points and organize plants by sun or water needs. They also improve air circulation and make maintenance easier, no crouching to deadhead flowers or check for pests.
Pyramid or triangle stacks use progressively smaller containers as you build up. Start with a 24-inch base pot, add an 18-inch mid-level, and top with a 12-inch finisher. Secure each tier by filling with soil before adding the next level, weight alone usually suffices, but you can thread a wooden stake or rebar through drain holes for extra stability.
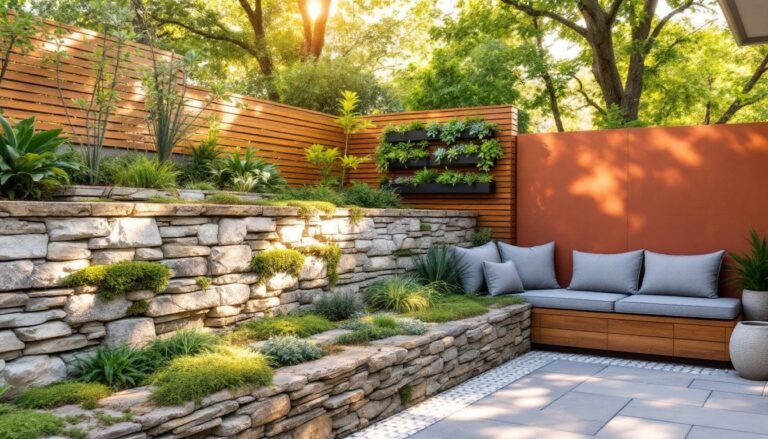
Stair-step designs use blocks, bricks, or landscape timber to create platforms at varying heights. Arrange containers on each level. This approach works well against a fence or wall and frames an entertaining backyard design without blocking sightlines.
Ladder planters repurpose old stepladders by resting pots on the rungs. This setup is inherently unstable, secure the ladder base and avoid top-heavy pots. Lightweight plastic or resin containers work better than heavy ceramic here.
Cascading strawberry planters are specialty items with pockets along the sides. Plant one strawberry per pocket, keep soil moist, and expect a vertical harvest. These also work for trailing flowers like petunias or calibrachoa.
When building tiered setups, consider the mature size and growth habit of your plants. Tall, upright plants go in back or on top tiers. Trailing and sprawling varieties go in front or on lower levels so they can spill without shading out neighbors.
For structural projects involving more than stacked pots, like built-in tiered beds with retaining walls, check local codes. Retaining walls over 4 feet tall often require permits and engineered plans.
Choosing the Right Materials and Plants for Your Planters
Material durability varies by climate and use. Terra cotta breathes well and looks timeless but cracks in freeze-thaw cycles. Concrete and stone planters are nearly indestructible but heavy. Resin and plastic are lightweight, affordable, and consistent but can look cheap and degrade under intense UV over 5 to 10 years.
Drainage is non-negotiable. Every planter needs at least one drain hole per square foot of base area. Containers sitting in saucers must be elevated slightly, use pot feet or small blocks, to prevent roots from sitting in standing water.
Soil choice impacts success more than container style. Standard potting mix works for flowers and herbs. Vegetables need more structure: look for mixes labeled “container vegetable blend” or amend potting soil with 10–20% compost for nutrient density. Avoid native soil, it compacts in containers, drains poorly, and may carry diseases.
Plant selection should match container size and sun exposure. Here are practical combinations:
- 12-inch pot: Single basil, one pepper plant, or three lettuce heads.
- 18-inch pot: Two tomato plants (determinate varieties), a mixed herb trio, or a squash or cucumber plant.
- 24-inch pot or raised bed: Full salad garden (lettuce, radishes, green onions), root vegetables, or a pollinator mix (zinnias, cosmos, coneflowers).
Many home design resources suggest grouping plants by water and sun needs, pair drought-tolerant succulents together, separate moisture-loving ferns and impatiens from Mediterranean herbs. This prevents overwatering some while underwatering others.
For year-round interest, use planters for cool-season entertaining areas by rotating crops: lettuce and pansies in spring, tomatoes and marigolds in summer, kale and mums in fall.
Fertilization is essential in containers, frequent watering leaches nutrients faster than in the ground. Use a balanced, water-soluble fertilizer (10-10-10 or similar) every two weeks during active growth, or mix slow-release granules into soil at planting time per package instructions.
For long-term projects, additional outdoor design ideas can complement your planter choices and ensure your entire backyard stays cohesive in style and function.
Conclusion
Planters aren’t about perfection, they’re about working with what you’ve got. Start with one raised bed or a handful of containers, learn what your plants and space need, and expand from there. The best planter is the one you’ll actually build and maintain, whether that’s a pristine cedar raised bed or a repurposed bucket on a balcony.