A gazebo transforms a backyard from ordinary to exceptional, a dedicated space for morning coffee, weekend BBQs, or quiet evenings under the stars. Whether someone’s working with a sprawling lawn or a compact patio, the right gazebo design brings structure, shade, and style to outdoor living. This guide walks through classic and contemporary designs, budget-conscious builds, smart placement strategies, decorating tips, and year-round upgrades to help homeowners create a gazebo that fits their space and lifestyle.
Table of Contents
ToggleKey Takeaways
- Backyard gazebo designs range from classic wooden octagon styles to contemporary steel frames with polycarbonate or louvered roofs, each offering distinct aesthetic and functional benefits.
- Budget-friendly gazebo options include kit structures ($1,200–$2,500), pop-up canopies ($200–$600), and DIY builds using reclaimed materials that can reduce costs by 30–50%.
- Optimal gazebo placement is 15–25 feet from the back door, positioned to face a natural focal point while accounting for sun exposure and wind patterns year-round.
- Properly anchored foundations with 6×6 treated lumber posts set in concrete footings at least 42 inches deep (below frost line) ensure structural integrity and longevity.
- Transform a bare gazebo into an outdoor living room by adding weather-resistant furniture, string lighting, ceiling fans, and screen systems for comfort across all seasons.
- Year-round usability improves with strategic upgrades like propane heaters, retractable mosquito screens, and annual maintenance including deck sealant reapplication and fastener inspection.
Classic Wooden Gazebo Designs for Timeless Appeal
Wooden gazebos remain the gold standard for homeowners seeking traditional charm. Pressure-treated pine is the most budget-friendly option, typically costing $8–$12 per board foot, while cedar and redwood offer natural rot resistance and rich color at $15–$25 per board foot.
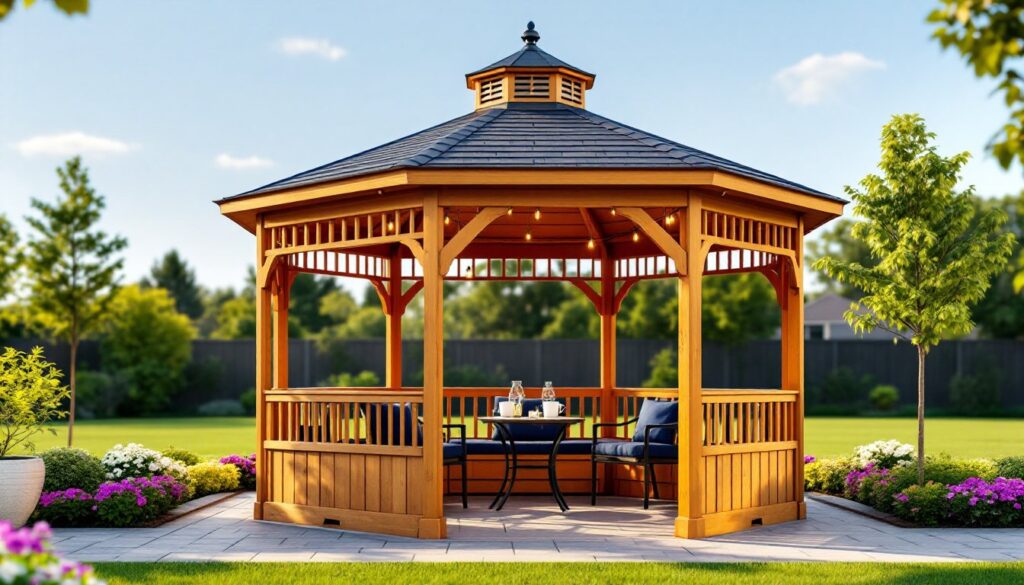
A standard octagonal gazebo measures 10–14 feet in diameter and stands 8–10 feet tall at the center peak. This size comfortably seats six to eight people with furniture. The defining feature is the cupola (the small roof structure at the peak), which adds vertical interest and ventilation.
For structural integrity, posts should be 6×6 or 4×4 treated lumber anchored to concrete footings at least 42 inches deep (or below frost line in cold climates). Roof rafters are typically 2×6 or 2×8 boards spaced 16 or 24 inches on center, depending on snow load requirements per local building codes.
Safety note: Always wear eye protection when cutting lumber and a dust mask when sanding pressure-treated wood. Check with your local building department, most jurisdictions require permits for structures over 120 square feet or those with permanent foundations.
Traditional gazebo roofs use asphalt shingles (standard 3-tab or architectural) or cedar shake shingles for a higher-end look. Figure roughly three bundles of shingles per 100 square feet of roof surface. A circular saw or miter saw handles most cuts, but a compound miter saw makes the angled rafter cuts much easier.
Modern and Contemporary Gazebo Styles
Contemporary gazebos ditch Victorian details for clean lines and mixed materials. Steel or aluminum frames paired with composite decking, polycarbonate panels, or fabric canopies create a sleek, low-maintenance structure.
Louvered roof gazebos (also called pergola-gazebo hybrids) feature adjustable aluminum slats that tilt to control sunlight and rain. Brands like StruXure and Azenco offer motorized systems, but manual crank versions cost significantly less. These work especially well in hot climates where airflow matters as much as shade.
Flat-roof or single-slope designs suit modern architecture and simplify construction. Use 2×10 or 2×12 joists for a flat roof, with a minimum 1/4-inch per foot slope for drainage. Top with EPDM rubber membrane or metal roofing panels, both handle standing water better than shingles.
For a minimalist look, consider a post-and-beam design with exposed hardware. Black powder-coated steel posts (4×4 or 6×6 hollow square tubing) paired with natural wood beams create striking contrast. Anchor posts with Simpson Strong-Tie post bases bolted to concrete piers.
Polycarbonate roof panels (corrugated or multiwall) are popular in contemporary gazebo design, providing UV protection while allowing filtered light. They’re lightweight, impact-resistant, and available in clear, bronze, or opaque white. Overlap panels by at least one corrugation and seal with compatible closure strips to prevent leaks.
Budget-Friendly Gazebo Ideas for Every Homeowner
A DIY gazebo doesn’t require a contractor’s budget. Kit gazebos from home centers start around $1,200–$2,500 for an 10×10-foot structure with pre-cut lumber and hardware. Assembly typically takes two people a weekend.
For an even lower price point, a pop-up canopy gazebo with a steel frame and polyester top runs $200–$600. These aren’t permanent, but they’re ideal for renters or anyone testing placement before committing to a build. Look for powder-coated steel frames and UV-resistant fabric rated for at least two seasons of use.
Repurposed materials cut costs significantly. Salvaged lumber, reclaimed barn wood, or recycled composite decking can reduce material expenses by 30–50%. Just inspect carefully for rot, insect damage, or structural weakness before use.
Consider a simple square or rectangular footprint instead of an octagon. Cutting and assembling 90-degree angles is far easier than calculating and cutting the 22.5-degree miters required for eight-sided structures. A 12×12-foot square gazebo uses straightforward framing: four corner posts, perimeter beams, and parallel roof joists.
Skip the built-in flooring initially. A gravel base with pavers or poured concrete pad can be added later. For now, level the ground, lay landscape fabric, spread 3–4 inches of crushed gravel, and tamp it firm. This provides a stable, well-draining surface without the cost of decking.
Many homeowners looking to expand their entertaining options often explore backyard design ideas for entertaining to complement their gazebo setup.
Gazebo Placement and Layout Considerations
Location makes or breaks a gazebo. Place it too close to the house and it feels redundant: too far and it’s inconvenient.
Ideal placement is 15–25 feet from the back door, close enough for easy access with drinks and food, far enough to feel like a separate destination. If the yard has a natural focal point (a pond, garden bed, or mature tree), orient the gazebo to face it.
Sun and wind patterns matter year-round. Observe where afternoon shade falls in summer and where wind hits hardest in fall. In hot climates, position the gazebo to catch prevailing breezes. In cold regions, shelter it from north winds with fencing, hedges, or the house itself.
Check for underground utilities before digging footings. Call 811 (the national “Call Before You Dig” hotline) at least two business days before breaking ground. Hitting a gas or electric line isn’t just expensive, it’s dangerous.
Level ground is non-negotiable. A gazebo built on a slope will rack and twist over time. If the site slopes more than 6 inches over 10 feet, plan for stepped footings or a raised deck platform. Rent a laser level or use a long straightedge and 4-foot level to assess grade.
Consider access paths. A 3–4 foot wide walkway of pavers, flagstone, or mulch connects the gazebo to the house and other yard features. This prevents worn grass paths and makes the space usable even after rain.
Creating a cohesive outdoor layout often involves integrating multiple features, and patio design plays a key role in connecting a gazebo to the rest of the yard.
Decorating Your Gazebo for Function and Comfort
A bare gazebo is just a roof on posts. Furnishing and decorating turns it into a true outdoor room.
Furniture scale matters. An 10×10-foot gazebo fits a small bistro set or two Adirondack chairs. A 12×12-foot space accommodates a four-person dining table or a sectional loveseat. Measure furniture before buying, outdoor pieces often run bulkier than expected.
All-weather materials are essential. Look for powder-coated aluminum frames, resin wicker, or teak and cedar for wood options. Cushions should have solution-dyed acrylic fabric (like Sunbrella) that resists fading and mildew. Store cushions during heavy rain or winter, even if they’re rated for outdoor use.
Lighting transforms usability. String lights (LED Edison bulbs or café-style) add ambiance without hard-wiring. For permanent installations, run UL-listed outdoor-rated cable in conduit to code-compliant junction boxes. Solar-powered post cap lights work for subtle perimeter lighting without electrical work.
Ceiling fans make a huge difference in summer. A 52–60 inch outdoor-rated fan with damp or wet location certification mounts to the gazebo’s center beam or cupola framing. Confirm the structure can support the fan’s weight (typically 30–50 pounds): add blocking between rafters if needed.
Privacy screens and curtains define the space and block wind or low sun. Outdoor curtain panels in fade-resistant polyester hang from ceiling-mounted tracks or heavy-duty curtain rods. Lattice panels, bamboo roll-up shades, or even outdoor fabric stretched on frames offer semi-permanent options.
For those planning larger gatherings, a Backyard Oasis Entertaining Bar can be positioned near the gazebo for seamless hosting.
Year-Round Gazebo Features and Upgrades
Extending gazebo season into fall and spring (or year-round in mild climates) requires thoughtful upgrades.
Outdoor heaters add 10–20 degrees of comfort on cool evenings. Propane patio heaters (the tall mushroom-style units) warm a 10–15 foot radius and cost $150–$400. Wall-mounted infrared electric heaters work well for enclosed or partially enclosed gazebos and require a dedicated 120V or 240V circuit installed by a licensed electrician per NEC standards.
Fire pits or fireplaces create a focal point and natural gathering spot. A portable propane fire table is the easiest option. For built-in fire features, maintain at least 10 feet of clearance from structures per most fire codes, that includes gazebo posts and roof overhangs. Use only fire-rated pavers or natural stone for the surround.
Insect screens or mosquito netting make warm-weather evenings tolerable. Retractable screen systems mount to the inside of posts and roll down when needed. DIY versions use Velcro strips and mesh fabric from fabric stores. Ensure screens have a tight weave (18×16 mesh or finer) to block even small insects.
Weatherproofing extends structure life. Apply deck stain or sealant every 2–3 years to wood surfaces. Check fasteners and hardware annually for rust: replace with stainless steel or galvanized bolts as needed. Inspect roof shingles each spring for wind damage or missing granules.
Garden design ideas from Gardenista offer inspiration for landscaping around gazebos to create a cohesive outdoor retreat.
Electrical and plumbing upgrades require permits and licensed professionals in most jurisdictions. Running power for outlets, lighting, or an outdoor TV involves trenching 18 inches deep (minimum) for buried conduit and installing GFCI-protected circuits. Plumbing for a wet bar or sink requires proper drainage and freeze protection in cold climates.
Conclusion
A well-planned gazebo delivers shade, shelter, and a defined space for outdoor living. From classic wood octagon designs to sleek modern steel frames, the options fit every skill level and budget. Focus on solid foundations, proper placement, and thoughtful upgrades to create a backyard structure that works year-round. Whether someone’s hosting backyard celebrations or just carving out a quiet corner, a gazebo makes every square foot count.