Most backyards have at least one awkward corner, that leftover triangle where the fence meets, or the narrow wedge behind the shed that collects leaves and gets ignored. But these forgotten zones are actually prime real estate for creating functional, inviting spaces. Whether it’s 15 square feet or 50, a well-designed corner can anchor your yard’s layout, solve drainage headaches, and give you a reason to actually use that back gate. With the right approach, those dead zones become destinations.
Table of Contents
ToggleKey Takeaways
- Backyard corner ideas transform overlooked spaces into functional focal points that anchor your yard’s layout and solve practical issues like drainage and wind exposure.
- Corner seating areas require minimal space (as little as 6×6 feet) and benefit from natural shelter created by fences, making them ideal for intimate gatherings or quiet retreats.
- Vertical gardens and living walls maximize small corner spaces by using fence lines as built-in support, perfect for herbs, climbing plants, or shade-tolerant varieties.
- Fire pits and water features in corners create gathering zones while keeping plumbing, pumps, and tubing hidden along fence lines for a cleaner aesthetic.
- Corners naturally contain activity, making them safer for children’s play areas and pet zones while reducing the need for additional barriers across the yard.
Why Backyard Corners Deserve Your Attention
Corners naturally draw the eye because they break up sightlines and create boundaries. Left empty, they feel unfinished. But treat them intentionally, with structure, planting, or hardscape, and they become focal points that make the whole yard feel designed, not accidental.
From a practical standpoint, corners often sit outside the main traffic flow, which makes them ideal for seating, storage, or activities that need a little separation. They’re also easier to enclose or partially screen, giving you privacy without fencing off the entire yard.
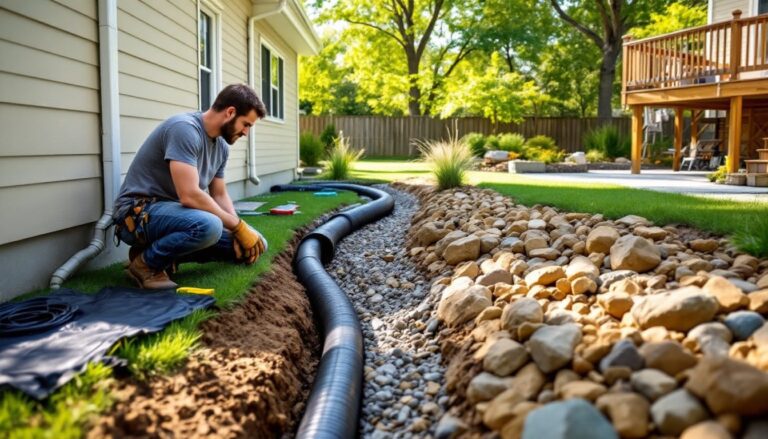
Many corners also present challenges: poor drainage, awkward angles for mowing, or shade from two fence lines. Addressing these issues with a purpose-built feature, like a gravel fire pit that handles runoff or a vertical garden that thrives in part shade, turns a problem area into an asset. The key is working with the space, not against it.
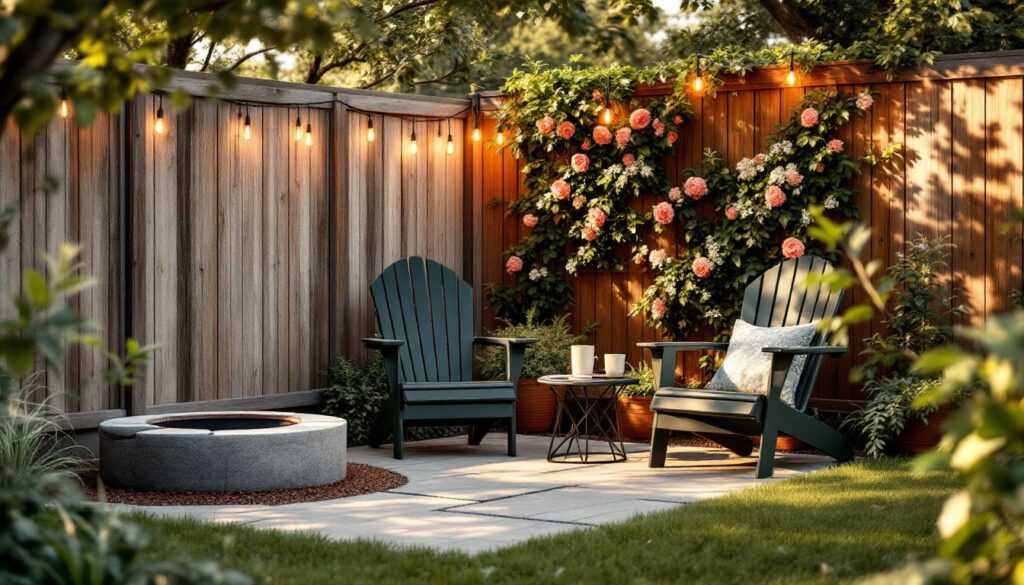
Create a Relaxing Corner Seating Area
A corner naturally shelters seating from wind and creates a cozy, semi-enclosed feel. Start by defining the footprint: most two-person seating nooks need at least 6 feet × 6 feet, though you can go smaller with built-in benches.
Materials to consider:
- Pavers or flagstone for the base (easier to level than poured concrete in tight spaces)
- Gravel or decomposed granite if drainage is an issue
- Treated lumber (actual dimensions: 2×4s are 1.5″ × 3.5″, 2×6s are 1.5″ × 5.5″) for built-in bench frames
- Outdoor cushions with removable, washable covers (look for solution-dyed acrylic fabrics that resist fading)
For a low-maintenance setup, use two Adirondack chairs angled into the corner with a small side table. If you’re building a bench, anchor 4×4 posts (actual 3.5″ × 3.5″) into concrete footings or use post bases rated for outdoor use. Cap the bench seat with 2×6 or 2×8 planks, spaced 1/4″ apart for drainage.
Add a shade sail or pergola if the corner gets afternoon sun. Pergolas don’t require a permit in most jurisdictions if they’re under 120 square feet and not attached to the house, but check local codes. For evening use, string low-voltage LED café lights (12V systems are DIY-friendly and don’t require an electrician). This setup pairs well with thoughtful entertaining backyard designs that tie corners into the larger flow.
Safety note: Wear gloves and safety glasses when cutting lumber. Use a miter saw for clean 45-degree cuts on bench trim: a circular saw works but requires more cleanup.
Design a Vertical Garden or Living Wall
Corners are ideal for vertical gardens because two fence lines give you built-in support. Vertical planting maximizes square footage, improves air circulation, and turns blank fences into green backdrops.
Options for vertical structures:
- Trellis panels: Cedar or pressure-treated pine, typically 2 feet × 6 feet or 4 feet × 8 feet. Attach to fence posts with galvanized lag screws (5/16″ × 3″).
- Modular pocket planters: Fabric or recycled plastic pockets that hang on fence rails. Good for herbs, succulents, or shallow-rooted annuals.
- Pallet gardens: Repurpose a heat-treated (look for “HT” stamp, not chemically treated “MB”) pallet. Line the back with landscape fabric, fill with potting mix, and plant through the slats.
For a more permanent solution, build a living wall frame from 2×2 lumber (actual 1.5″ × 1.5″). Space horizontal rails 12 inches apart and attach small pots or planters with wire or zip ties. Install a drip irrigation line along the top rail, most systems run off standard hose bibs and use 1/4-inch tubing with adjustable emitters.
Plant selection matters:
- Full sun corners: Climbing roses, clematis, jasmine, or edibles like pole beans and cherry tomatoes.
- Part shade: Ferns, hostas (in containers), ivy, or shade-tolerant herbs like mint and parsley.
- Drought-tolerant: Succulents, sedums, or Mediterranean herbs (rosemary, thyme, oregano).
A corner vertical garden works especially well in small yards where horizontal space is limited.
Watering tip: Vertical gardens dry out faster than ground beds. Check soil moisture daily during the first month, then adjust to every 2-3 days once plants establish. Use a moisture meter if you’re unsure.
Build a Corner Fire Pit or Outdoor Fireplace
A corner fire pit anchors the yard and pulls seating inward, creating natural conversation zones. Because corners are already defined by fences or walls, you can design a more compact footprint, important if your lot’s tight.
Pre-fab vs. custom options:
- Steel fire rings: Simplest install. Set on a gravel base (4-6 inches deep) for drainage. Rings typically range from 30 to 48 inches in diameter.
- Poured concrete fire pits: Requires formwork, rebar, and a refractory concrete mix rated to 2000°F. This is a weekend project for experienced DIYers.
- Stacked stone or block: Use retaining wall blocks or firebrick for the interior ring. Outer veneer can be natural stone, but the inner chamber must withstand direct flame.
Minimum clearances (check local fire codes):
- 10 feet from structures, fences, or overhanging branches
- 25 feet from combustible materials (most jurisdictions)
- Some cities prohibit open fires entirely or require permits for permanent installations. Verify before you dig.
Installation steps for a basic gravel-base fire pit:
- Mark a 4-foot-diameter circle (or 3×3-foot square for corners). Remove sod and excavate 6 inches deep.
- Tamp the soil with a hand tamper or plate compactor.
- Add 3 inches of 3/4-inch crushed stone, then 3 inches of pea gravel or lava rock (better heat resistance).
- Set the fire ring or first course of blocks. Level with a 4-foot spirit level.
- Stack additional courses (if building up), staggering joints. Use high-temp mortar or construction adhesive rated to 2000°F for stability.
- Surround with seating stones or pavers set on a sand base.
For gas fire pits, you’ll need a licensed professional to run the gas line per NFPA 54 (National Fuel Gas Code). Natural gas offers convenience: propane tanks work if gas isn’t available but require periodic refills.
Pair the fire feature with a small outdoor entertaining setup to complete the zone.
Safety: Always keep a fire extinguisher or garden hose within reach. Never burn treated lumber, which releases toxic fumes.
Install a Corner Water Feature for Tranquility
Water features mask street noise, attract birds, and add movement to static corners. A corner placement keeps pumps and plumbing tucked away and uses fence lines to hide tubing.
Types suited for corners:
- Pondless waterfalls: Water flows over stacked stone into a buried reservoir. Requires a submersible pump (typically 200-600 GPH for a 2-3 foot fall), flexible PVC tubing (1-1.5 inches), and a gravel basin lined with pond liner (45-mil EPDM).
- Wall-mounted fountains: Attach to fence or garden wall. Self-contained models recirculate from a hidden basin: others need a small catch pool.
- Bubbling urns or spheres: Simplest DIY option. Set a large ceramic pot or stone sphere over a reservoir, with water pumped up through the center. Uses a small fountain pump (50-100 GPH).
Basic pondless waterfall install:
- Dig a basin 2 feet deep × 3 feet wide. Shape a sloped channel leading to it.
- Line with pond underlayment (protects liner from roots and rocks), then 45-mil EPDM liner. Overlap edges by 12 inches on all sides.
- Place a pump vault or sturdy basin at the bottom. Set the pump inside.
- Fill the basin with river rock (2-4 inches) to within 6 inches of grade. Top with decorative stone.
- Run tubing up the slope to the water source (a stack of flat stones or a decorative spillway).
- Conceal tubing with soil, mulch, or additional stone. Plug the pump into a GFCI-protected outlet (required by NEC Article 680 for outdoor water features).
- Fill the reservoir with water, turn on the pump, and adjust flow with the valve (if equipped).
Electrical safety: If you don’t have an exterior GFCI outlet, hire a licensed electrician. Running a new circuit requires permits in most areas. Low-voltage pumps (12V) are available but offer less flow.
Water features require weekly top-offs (evaporation) and seasonal pump cleaning. Plan access to the reservoir for maintenance. Adding aquatic plants or floating water treatments reduces algae without chemicals. These features complement a well-designed patio by extending sensory interest.
Mosquito control: Moving water discourages mosquitoes, but add a mosquito dunk (Bti bacteria) to standing reservoirs as a backup.
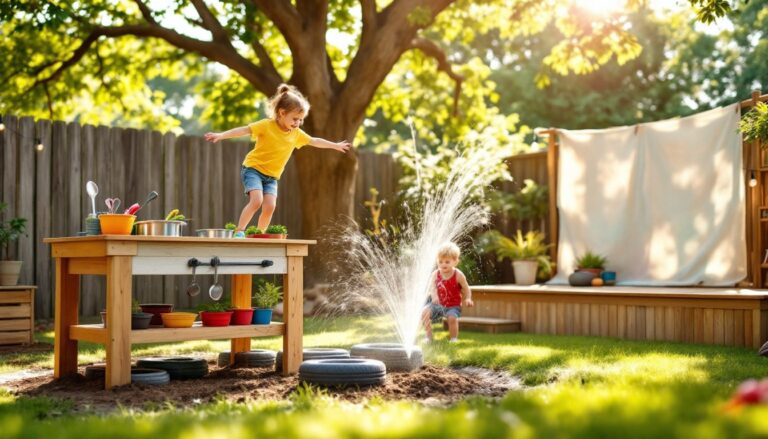
Transform Your Corner Into a Play or Pet Area
Corners naturally contain activity, making them safer for kids and pets. Fencing on two sides reduces the need for additional barriers and keeps toys or equipment from migrating across the yard.
For kids:
- Swing set or A-frame climber: Anchor legs with concrete footings (12 inches deep minimum) or use ground anchors rated for the equipment weight. Space swings at least 24 inches apart and ensure 6 feet of clearance in front and back (per ASTM F1487 playground safety standards).
- Sandbox: Build a simple frame from 2×8 or 2×10 treated lumber. Line the bottom with landscape fabric (not solid plastic, drainage matters). Fill with play sand (50-pound bags cover roughly 0.5 cubic feet). A 4×4-foot box needs about 12-15 bags for 12 inches of depth.
- Artificial turf or rubber mulch: Softens falls. Rubber mulch should be 6-12 inches deep for adequate impact attenuation. Turf requires a compacted base and infill: DIY install is doable but labor-intensive.
For pets, a child-friendly backyard approach also works for dogs, with durable materials and secure boundaries.
For pets (especially dogs):
- Gravel or mulch run: Easier on paws than bare dirt and drains better. Use pea gravel (1/4-3/8 inch) or shredded cedar mulch. Edge with landscape timbers or plastic edging to contain material.
- Shade structure: Dogs overheat quickly. A 10×10-foot shade sail blocks UV and costs less than a permanent roof. Anchor corner grommets to eye bolts in fence posts or dedicated 4×4 posts set in concrete.
- Digging pit: If your dog digs, give them a designated spot. Excavate 12 inches, fill with loose sand or soft soil, and bury toys to encourage use. Border with landscape timber or stone.
Safety for both: Fence off any water features, fire pits, or tool storage. Avoid toxic plants (azaleas, sago palms, lilies) and check that treated lumber is CA-C (Copper Azole), not older CCA, which leaches arsenic. Install a self-closing gate latch if the corner opens to another part of the yard.
Maintenance: Rake sand weekly to remove debris. Hose down rubber mulch monthly to prevent odor buildup. Turf needs occasional brushing to keep infill evenly distributed.
Conclusion
Corners don’t have to be afterthoughts. With a bit of planning and the right materials, they become the parts of the yard people actually remember, whether it’s a quiet spot to read, a splash of greenery, or the place everyone gathers after dark. Pick a project that matches your skill level, prep the site properly, and don’t skip the boring stuff like drainage and leveling. The details make the difference between a corner that works and one that just fills space.