An attached covered patio extends living space beyond four walls, bridging the gap between indoor comfort and outdoor air. It’s not just an aesthetic upgrade, it’s a functional zone that weathers rain, sun, and every backyard gathering in between. Whether planning to tackle this as a DIY build or hiring out structural work, understanding roof styles, material trade-offs, and integration with existing architecture sets realistic expectations and avoids costly do-overs. This guide walks through proven designs, material choices, and finishing touches that turn an underused backyard into an all-season retreat.
Table of Contents
ToggleKey Takeaways
- Attached covered patio ideas enhance living space while providing permanent weather protection and typically boost resale value more than standalone structures.
- Gable roofs offer classic aesthetics and excellent drainage, while flat roofs and pergola-style designs deliver modern lines and maximize light for contemporary backyard spaces.
- Material choices range from affordable pressure-treated pine ($8–$12 per 2×6) to premium cedar and aluminum systems, each with trade-offs in durability, maintenance, and upfront cost.
- Proper ledger attachment to existing house studs, code-compliant footings below the frost line, and weather-tight flashing are non-negotiable for structural integrity and water resistance.
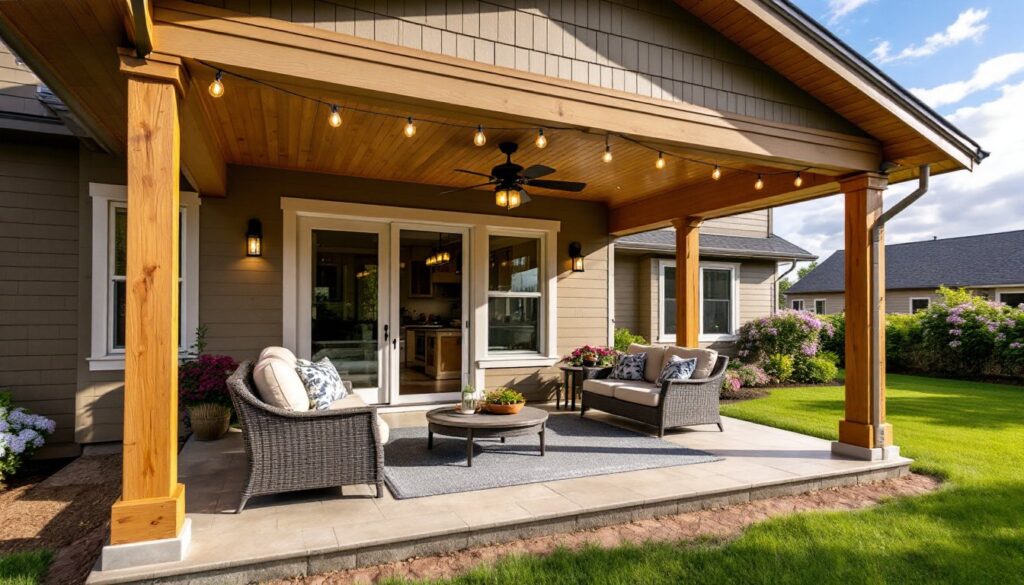
- Overhead roofs unlock practical enhancements like recessed lighting, ceiling fans, and hardwired circuits that transform the patio into a true all-season outdoor room.
- A basic 10×12 DIY gable patio with pressure-treated framing and asphalt shingles can be completed for under $2,500 in materials, while hiring professionals typically runs $15–$35 per square foot.
Why Choose an Attached Covered Patio for Your Backyard?
Attached patios tie directly into a home’s existing structure, usually connecting to the back wall via a ledger board fastened to wall studs or band joists. This integration creates seamless access through sliding doors or French doors, making the patio feel like an extension of the living room or kitchen.
From a structural standpoint, attaching to the house means sharing part of the load: the ledger supports one side of the roof, while freestanding posts or columns carry the other. This typically reduces lumber and footing costs compared to a detached pavilion. Most jurisdictions require a building permit for attached structures over a certain size (often 120 sq ft) because they alter the home’s footprint and involve flashing, drainage, and sometimes electrical work.
Weather protection is the primary driver. A roof overhead keeps furniture dry, prevents UV fade on cushions, and extends usability into spring drizzle or summer afternoon storms. It also creates a defined ceiling plane, making it easier to install ceiling fans, recessed lighting, or even outdoor speakers, upgrades that feel awkward on an open deck.
Finally, attached patios typically boost home resale value more than standalone pergolas or gazebos because they’re viewed as permanent improvements tied to the main structure. Just ensure local zoning setbacks and HOA covenants allow the footprint you’re planning.
Classic Gable Roof Patio Designs
A gable roof slopes in two directions from a central ridge, the same profile you see on most traditional houses. For a patio, the ridge usually runs parallel to the house wall, with the high end at the ledger and the low end supported by posts at the outer edge.
Advantages include excellent water runoff, generous headroom at the peak, and a classic look that matches most home styles, Colonial, Craftsman, Farmhouse. The pitch typically mirrors the main roof (common pitches are 4:12 or 6:12), so rainwater sheds quickly and snow doesn’t accumulate in northern climates.
Framing a gable patio requires rafters or trusses. Rafters are site-cut: trusses arrive pre-engineered. For DIYers comfortable with a miter saw and speed square, rafters are manageable on spans under 12 feet. Wider spans or heavy roofing (tile, slate) often demand engineered trusses and a crane for placement, best left to pros.
Roofing material choices range from asphalt shingles (economical, matches existing roof) to standing-seam metal (long-lasting, modern aesthetic) to corrugated polycarbonate panels (budget-friendly, lets diffused light through). If matching the house roof, order shingles from the same manufacturer lot to avoid color mismatch.
One trade-off: gable roofs block more sky and light than flat or pergola styles. If the attached wall has windows, expect darker interiors unless you add skylights or leave gable ends open for cross-ventilation.
Modern Flat Roof and Pergola-Style Covered Patios
Flat roofs (technically low-slope, around 1:12 pitch for drainage) deliver clean, contemporary lines and maximize overhead clearance. They’re popular in mid-century modern and minimalist designs, and they simplify integration if the house itself has a flat or shed roof.
Construction uses joists instead of rafters, typically 2×8 or 2×10 pressure-treated lumber on 16-inch centers, topped with tongue-and-groove decking or plywood sheathing and a waterproof membrane, EPDM rubber, TPO, or modified bitumen. Because flat roofs don’t self-drain as aggressively as pitched roofs, scuppers or internal drains are critical. Standing water leads to rot and leaks.
A pergola-style covered patio uses widely spaced rafters or beams with open slats, sometimes topped with retractable fabric, lattice, or climbing vines. Pergolas as open structures offer partial shade and architectural definition without the permit complexity of a solid roof in some jurisdictions, but they don’t keep rain out.
To split the difference, many homeowners install a pergola frame and retrofit it with clear polycarbonate panels or aluminum louvered systems that pivot to control sun and rain. Louvered roofs are pricier (often $25–$50 per square foot installed) but offer year-round flexibility.
Both flat and pergola styles suit entertaining backyard designs where light and openness matter as much as shelter.
Material Options: Wood, Aluminum, and Composite
Pressure-treated pine remains the most common framing choice, affordable, widely available, and code-approved for ground contact when rated .40 or .60 retention. Expect to pay $8–$12 per 2×6×8 and around $15–$20 for a 6×6 post. Downsides: it twists as it dries, requires annual staining or sealing, and eventually weathers to gray unless maintained.
Cedar or redwood offer natural rot resistance and richer grain but cost two to three times more than treated pine. They’re worth it for exposed beams and posts where appearance matters. Both still need UV-protective finish to prevent silvering.
Aluminum patio kits from manufacturers like Alumawood or Duralum mimic wood grain but never rot, warp, or need paint. They arrive pre-cut with snap-together brackets, making them true DIY projects even for first-timers. Trade-off: they’re pricier upfront ($20–$35 per linear foot of beam) and can feel lightweight compared to timber.
Composite and PVC lumber (Trex, Azek, TimberTech) work for fascia, trim, and decorative elements but aren’t rated for structural loads like beams or joists unless specifically engineered for that purpose. Always check span tables and load ratings.
For roofing, corrugated metal panels in Galvalume or painted steel run $2–$4 per square foot and install quickly with exposed fasteners. Standing-seam metal looks sharper but costs $7–$12 per square foot installed. Asphalt shingles are the budget baseline at $1–$2 per square foot in materials.
When pricing materials, factor in flashing (to seal the ledger connection), post anchors (typically adjustable galvanized brackets set in concrete footings), and joist hangers, small parts that add up but prevent structural failures.
Enhancing Your Covered Patio with Lighting and Furniture
A roof overhead opens opportunities for hardwired lighting that’s impractical on open decks. Recessed canister lights (4-inch or 6-inch) drop into the ceiling for clean, downward illumination, plan one fixture per 25–30 square feet. Use IC-rated, wet-location housings if the ceiling is exposed to moisture.
Ceiling fans with integrated lights improve summer comfort and bug control. Choose models rated for damp or wet locations (UL 1598 listing). A 52-inch blade span suits most 10×12 or 12×14 patios: larger spaces may need two fans or a 60-inch model.
String lights or pendant fixtures add ambiance. If installing pendants, use weatherproof junction boxes and GFCI-protected circuits per NEC Article 210.8(A)(3), outdoor receptacles and lighting within 6 feet of grade require ground-fault protection.
Low-voltage LED strip lighting along beams or post caps creates indirect glow and is easier to DIY than line-voltage wiring. A typical 16-foot kit draws under 20 watts and plugs into a standard outlet with a transformer.
For furniture, covered patios tolerate materials that struggle in full sun: natural wicker, upholstered seating, and wood tables that would otherwise fade or mildew. That said, all-weather wicker (resin-wrapped aluminum frames) and powder-coated steel still outperform in longevity. Choosing the right patio furniture selection balances aesthetics with maintenance realities.
Outdoor rugs anchor seating areas and soften concrete or composite decking underfoot. Polypropylene rugs resist mold and rinse clean, but they can still trap moisture, lift and air them out monthly.
Budget-Friendly DIY Attached Patio Ideas
A basic 10×12 gable patio (120 square feet) with pressure-treated framing, asphalt shingles, and four posts can come in under $2,500 in materials if you already own a circular saw, drill, and level. That assumes DIY labor, no electrical, and a simple concrete-pier footing system.
Footings are the foundation, literally. Most codes require footings below frost line (varies from 12 inches in the South to 48 inches in northern climates). Sonotubes (cardboard forms) filled with concrete and fitted with adjustable post anchors are the standard DIY approach. Rent an auger ($50–$75/day) to dig 10-inch or 12-inch diameter holes rather than hand-digging.
Cost estimators on platforms like HomeAdvisor suggest $15–$35 per square foot for contractor-built patios, but regional labor rates and material availability swing that widely. In 2026, lumber volatility continues, lock in prices when you see a dip.
Simplified roof options cut costs and complexity. A shed roof (single-slope) requires only one rafter cut angle and uses the house wall as the high side. It’s structurally simpler than a gable and often doesn’t trigger engineering review for spans under 12 feet.
Corrugated panels over a simple 2×6 rafter grid can be up and weather-tight in a weekend. Fasten with neoprene-washered screws every 12 inches on rafters: overlap panels by one corrugation and seal ridge caps with butyl tape.
For finishing, skip costly tongue-and-groove cedar ceilings in favor of painted plywood or leave the underside of metal roofing exposed for an industrial look. Paint-grade trim is half the cost of clear cedar and looks identical once primed.
If the project exceeds DIY comfort, especially ledger attachment, flashing, or electrical, hire those trades and finish carpentry yourself. A botched ledger connection can pull away from the house under snow load, creating both safety and water-intrusion nightmares.
Conclusion
An attached covered patio is one of the highest-return DIY projects, when done right. Prioritize sound structure: proper ledger attachment, code-compliant footings, and weather-tight flashing matter more than decorative beams or furniture. Choose roof and material styles that complement the home’s architecture and your regional climate, and don’t skip permits if local code requires them. With the frame secure and the roof overhead, the space becomes a true outdoor room, ready for morning coffee, summer dinners, and every season in between.