Building a backyard patio doesn’t require a contractor’s budget or months of disruption. With the right materials and a bit of elbow grease, homeowners can create functional outdoor living space that handles everything from morning coffee to evening gatherings. This guide focuses on practical, achievable projects using accessible materials and straightforward techniques. Whether working with a bare patch of yard or refreshing a tired slab, these ideas prioritize real-world installation, durability, and maintenance over complicated designs.
Table of Contents
ToggleKey Takeaways
- Simple backyard patio ideas using gravel or concrete pavers can be completed under $400 with DIY installation, making professional-quality outdoor spaces accessible to homeowners on any budget.
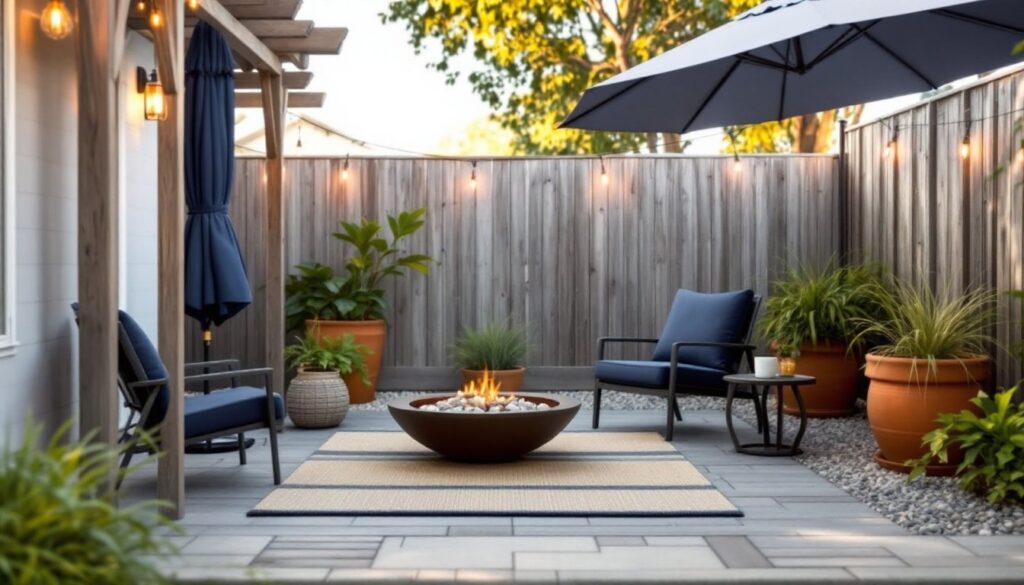
- A well-designed seating area requires just a defined 6×8-foot footprint, weather-resistant furniture, an outdoor rug, and intentional layout to transform a bare patio into functional living space.
- Lighting extends usability beyond sunset—string lights, solar pathway stakes, and battery-powered spotlights all provide ambiance without requiring an electrician or permanent installation.
- Shade solutions like cantilever umbrellas, shade sails, or a simple pergola are essential for summer comfort and can be installed as weekend projects without specialized skills.
- Low-maintenance container gardens, raised beds with landscape fabric, and groundcover alternatives to grass soften patio edges while minimizing watering and upkeep.
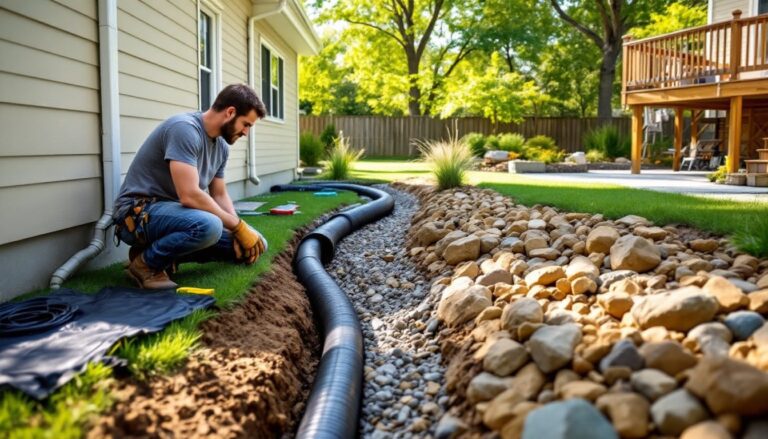
- Proper site preparation—excavation, soil compaction, and landscape fabric—is the foundation for durable patios that resist weeds and shifting, making initial effort essential to long-term success.
Budget-Friendly Patio Flooring Options
The foundation of any patio is the surface underfoot. Two of the most cost-effective and DIY-friendly options deliver professional results without specialized equipment or skills.
Gravel and Pea Stone Patios
Gravel patios rank among the simplest installations. The material costs roughly $35–$50 per ton, covering approximately 100 square feet at a 3-inch depth. That makes a 10×12-foot patio achievable for under $200 in materials.
Start by marking the perimeter and excavating 4–6 inches below grade. Compact the soil with a hand tamper or plate compactor (rent one for about $60/day). Lay landscape fabric to suppress weeds, then install edge restraint, plastic or metal strips anchored with stakes work fine. Add 2 inches of crushed stone base (not gravel), compact it, then top with 2–3 inches of pea gravel or three-quarter-inch crushed stone.
Pea gravel shifts underfoot more than angular stone, but it’s gentler on bare feet and drains instantly. Angular crushed stone locks together better and handles furniture weight without developing ruts. For dining areas, choose the angular option. Many DIYers enjoy low-cost pea gravel designs for casual seating zones.
Safety note: Wear gloves and safety glasses when spreading stone. Dust masks are smart if conditions are dry and windy.
Concrete Pavers and Stepping Stones
Concrete pavers offer a more polished look with only slightly more labor. Standard 12×12-inch pavers run $1–$3 each at big-box stores: a 10×12-foot patio needs about 120 pavers, or $120–$360 depending on finish.
Excavate the same 4–6 inches, compact the soil, and lay landscape fabric. Add 2 inches of crushed stone base, compact, then spread 1 inch of coarse sand (not play sand). Screed the sand level using a straight 2×4. Lay pavers in your chosen pattern, running bond, herringbone, or basketweave, butting them tight. Tap each paver with a rubber mallet to set it flush. Sweep polymeric sand into the joints, mist lightly with water, and let it cure. Polymeric sand hardens to lock pavers in place and resist weed growth.
For curves or irregular shapes, stepping stones (16–24 inches diameter) set in gravel or groundcover offer flexibility without cutting pavers. They’re ideal for transitional pathways connecting a patio to the yard. Solid patio design principles apply whether using pavers or stepping stones.
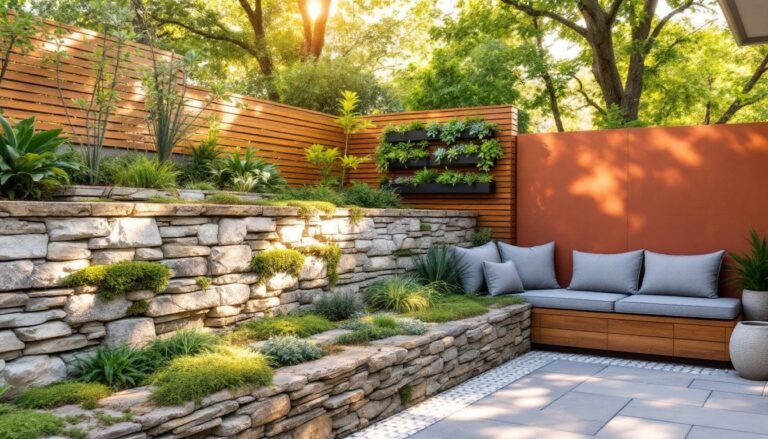
Create a Cozy Seating Area with Minimal Effort
A seating zone is what turns a slab into a living space. The setup doesn’t need to be elaborate, just intentional.
Start with a defined footprint. A 6×8-foot zone comfortably fits a small loveseat or a pair of chairs with a side table. Anchor the space with an outdoor rug (polypropylene resists moisture and UV) to visually separate the seating area from the rest of the patio. Rugs also cushion hard surfaces underfoot.
Choose furniture that handles the elements. Powder-coated aluminum frames resist rust: resin wicker over steel frames provides texture without rot. Avoid untreated wood unless you’re committed to annual sealing. Cushions should have solution-dyed acrylic covers (Sunbrella is the household name, but store brands perform nearly as well). Foam cores dry faster than polyester fill after rain.
If working with a tight budget, cinder blocks and dimensional lumber make surprisingly decent benches. Stack blocks, top with 2×10 pressure-treated planks, and add cushions. It’s not heirloom furniture, but it works. Thoughtful furniture arrangements make even basic setups feel intentional.
Pro tip: Leave at least 24 inches of clearance behind seating for foot traffic. Cramped spaces feel awkward, even outdoors.
Add a fire pit if local codes allow (check with your municipality, some jurisdictions restrict open flames within a certain distance of structures). A simple steel fire ring ($50–$150) set on pavers or gravel extends usability into cool evenings. Keep a bucket of sand or a hose nearby. Never leave fires unattended, and check wind conditions before lighting.
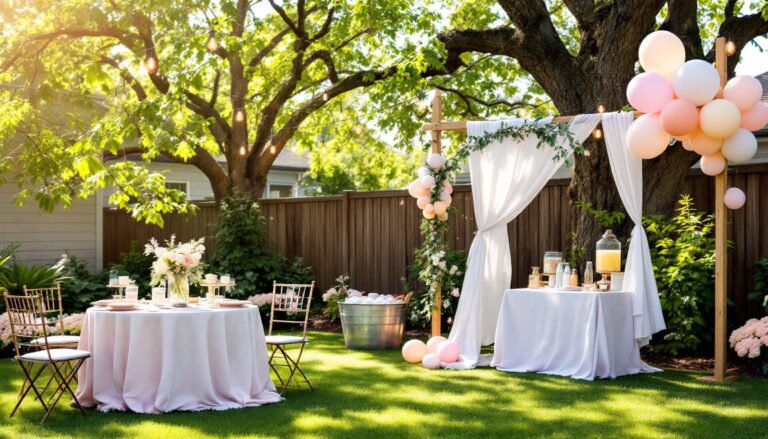
Add Ambiance with Easy Lighting Solutions
Lighting extends patio hours past sunset and transforms the mood. No need for an electrician, solar and battery options have improved dramatically.
String lights are the workhorse of patio lighting. Look for LED café-style bulbs on 16- to 18-gauge wire: they’re durable enough for year-round outdoor use. Mount them overhead using screw hooks into fascia boards, fence posts, or freestanding poles (4×4 posts set in concrete work well). Drape the wire in gentle catenary curves, not pulled tight, for a natural look. Solar-recharged string lights eliminate outlet hunting but provide dimmer light than plug-in versions.
Pathway lights (solar stakes or low-voltage) define edges and prevent toe-stubbing after dark. Space them 6–8 feet apart along patio borders. Low-voltage systems require a transformer (about $50) and 12/2 landscape wire but offer brighter, more consistent output than solar.
For task lighting over dining or grilling zones, battery-powered LED spotlights with remote controls mount to fences or walls without wiring. Expect 4–6 hours per charge depending on brightness.
Lanterns and candles add layered light. Use citronella candles in glass hurricanes to deter mosquitoes without chemical sprays. Avoid open flames on wood surfaces.
Safety reminder: Keep electrical connections off the ground and use GFCI-protected outlets for plug-in lights. Outdoor-rated extension cords only, indoor cords aren’t insulated for moisture.
Simple DIY Patio Shade Ideas
Full-sun patios cook by midday. Shade makes them usable through summer afternoons.
Cantilever umbrellas (offset style) provide 8–10 feet of coverage without a center pole blocking the table. Bases need to be hefty, 75–100 pounds minimum, or staked into the ground. Don’t cheap out here: a tipped umbrella ruins furniture and injures people. Wind ratings matter: look for wind-resistant vents in the canopy.
Shade sails (triangle or square) mount to posts, walls, or trees using stainless steel hardware. A 12×12-foot sail runs $60–$150 depending on fabric weight. Install at a 10-to-20-degree angle so water runs off rather than pooling. Use turnbuckles on anchor points to maintain tension. Shadecloth (rated by percentage, 50% to 90% blockage) works similarly but requires a frame.
For a permanent solution, a simple pergola built from pressure-treated 4×4 posts and 2×6 or 2×8 rafters provides dappled shade. Space rafters 12–16 inches on center. This is a weekend project for someone comfortable with a miter saw, drill, and post-hole digger. Posts should be set 24–36 inches deep in concrete (deeper in frost zones). Many outdoor entertaining setups incorporate pergolas as centerpiece structures.
Building note: Pergolas attached to a house typically require a ledger board lag-bolted into wall studs or masonry. Check local codes: some jurisdictions require permits for structures over a certain size or those attached to the home.
Drape outdoor curtains (fade-resistant polyester) on pergola sides for adjustable privacy and wind protection. Mount them on stainless steel cable or curtain rods with rust-proof rings.
Low-Maintenance Greenery and Planters
Plants soften patio edges and add vertical interest without constant fussing.
Container gardens are the easiest route. Use resin or fiberglass planters, they’re lightweight, won’t crack in freezes, and last years. Avoid terra cotta unless you bring it in before hard frost. Size matters: small pots dry out fast and require daily watering. Go for containers at least 12–16 inches in diameter.
Fill with potting mix (not garden soil, which compacts). Add slow-release fertilizer at planting. For low-maintenance options, choose perennials like ornamental grasses, sedums, or hostas (for shade). Annuals like petunias or geraniums need deadheading but deliver color all summer.
Raised beds along patio edges define the space and double as seating if capped with 2×6 or 2×8 planks. Build frames from pressure-treated 2×10s or composite decking. Line with landscape fabric and fill with a mix of topsoil and compost. Plant herbs, compact shrubs, or trailing plants like sweet potato vine.
For vertical interest, mount wall planters or trellises. Climbing plants like clematis or jasmine (depending on zone) provide screening and fragrance. Use galvanized or coated wire mesh as a trellis, secured with masonry anchors or screws into wood. Many ideas from Better Homes & Gardens translate well to small-scale patio plantings.
Irrigation tip: Drip irrigation kits (battery-operated timers, quarter-inch tubing, and emitters) automate watering for under $100. They’re especially useful if traveling in summer or dealing with a dozen containers.
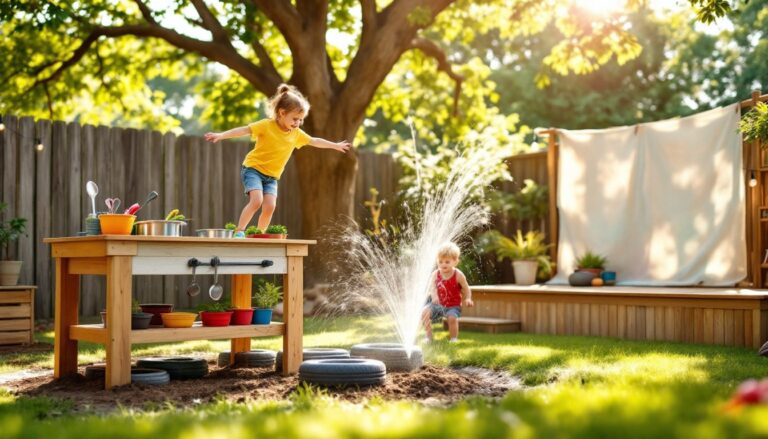
Weed barriers: Even around planters, lay landscape fabric or cardboard under gravel or mulch. It’s easier to install now than to pull weeds later. Refreshing ideas for family-friendly outdoor spaces often emphasize low-maintenance plantings around play zones.
Skip high-maintenance lawns adjacent to patios. Replace with groundcovers like clover or creeping thyme, which tolerate foot traffic and need no mowing. These also tie neatly into broader backyard entertaining designs that minimize upkeep while maximizing usability. For inspiration on farmhouse-style plantings and rustic touches, Country Living provides seasonal project ideas that suit simple patio surroundings.